After pausing this project for almost half a year (I was busy graduating and finding a job), the pandemic has me stuck at home with so much extra time on my hands. Since March, at least 10 days before the Netherlands went into Lockdown, I decided to restart this project, upgrade the electronics and laser cut and 3D print some new parts. Fortunately I was able to use the 3D printer and laser cutter at my workplace before we went into lockdown.
Here are some of the hardware upgrades I made:
- Replaced Raspberry Pi with NVidia Jetson Nano
- Upgraded to the Raspberry Pi camera V2
- Added an IMU (MPU-6050)
- Added Odometry (Hall-effect sensor and magnets)
- Added a new battery pack for the Jetson Nano
- Replaced the Donkey Car frame with new parts based on the NVidia JetRacer
On the software side, I decided to use the Robot Operating System (ROS1), but more about that in a separate article. In this blog, I will only write about the hardware changes I made to the Donkey Car.
Hardware Changes
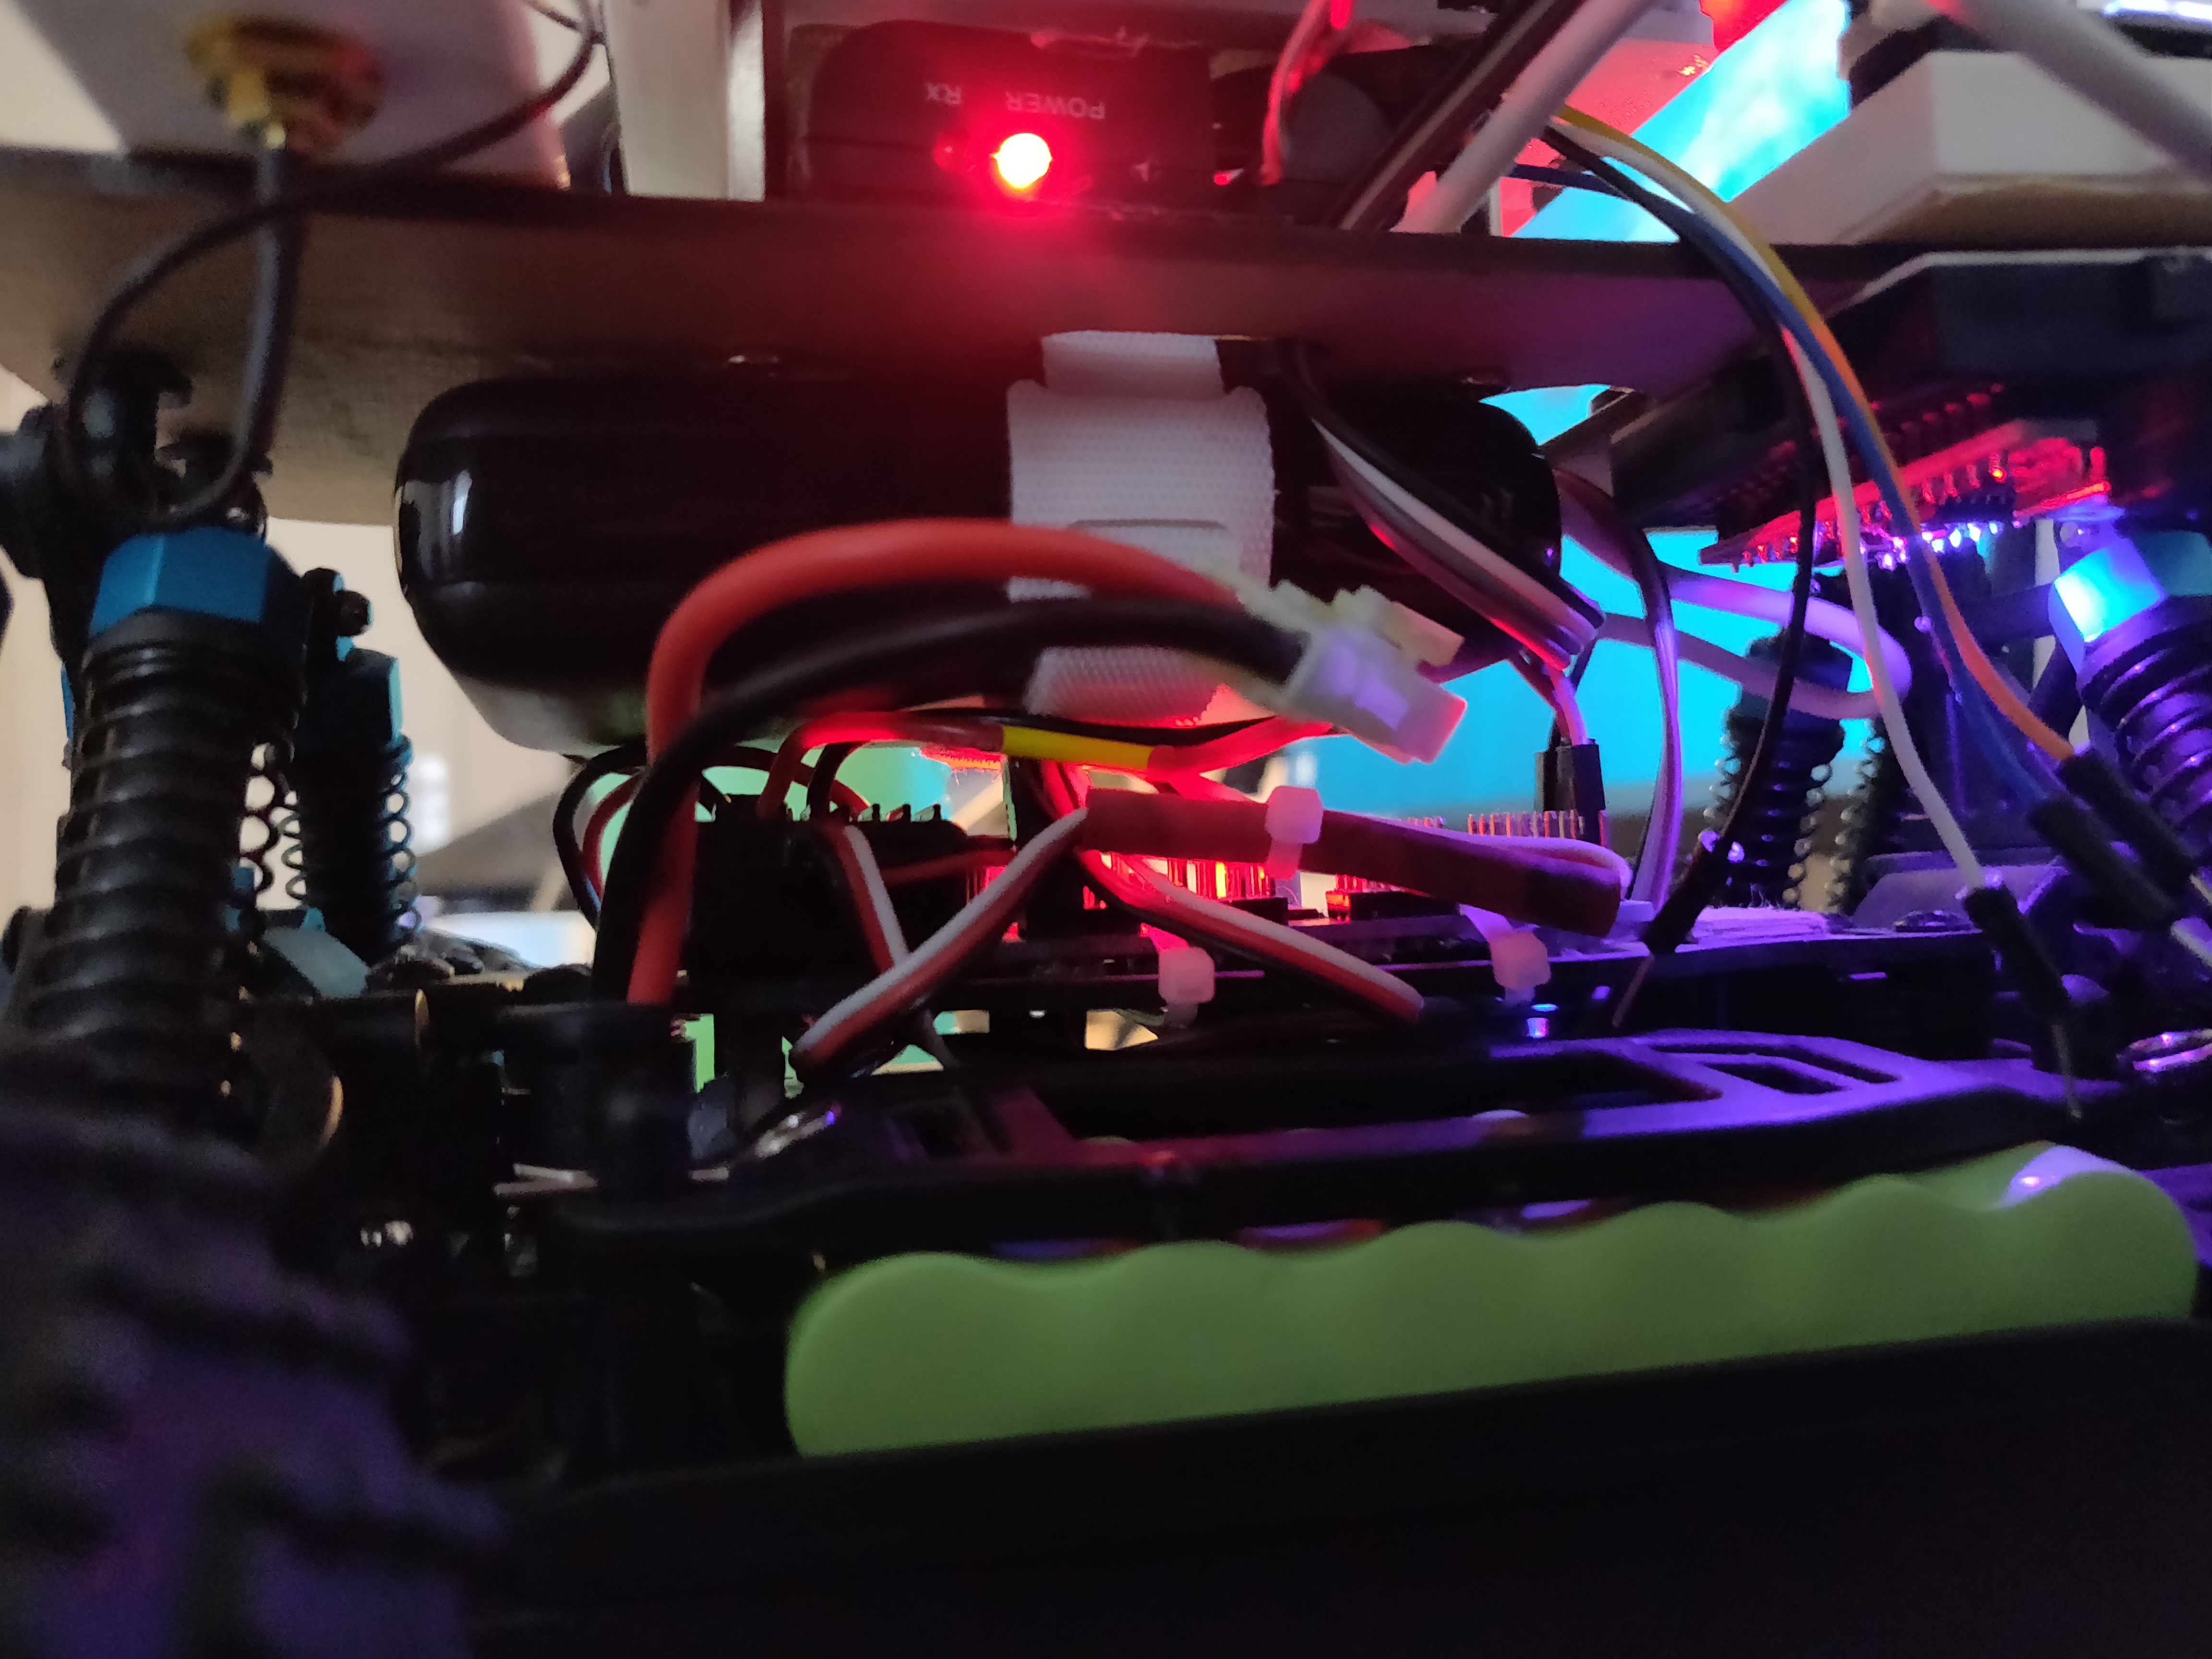
Base Plate:
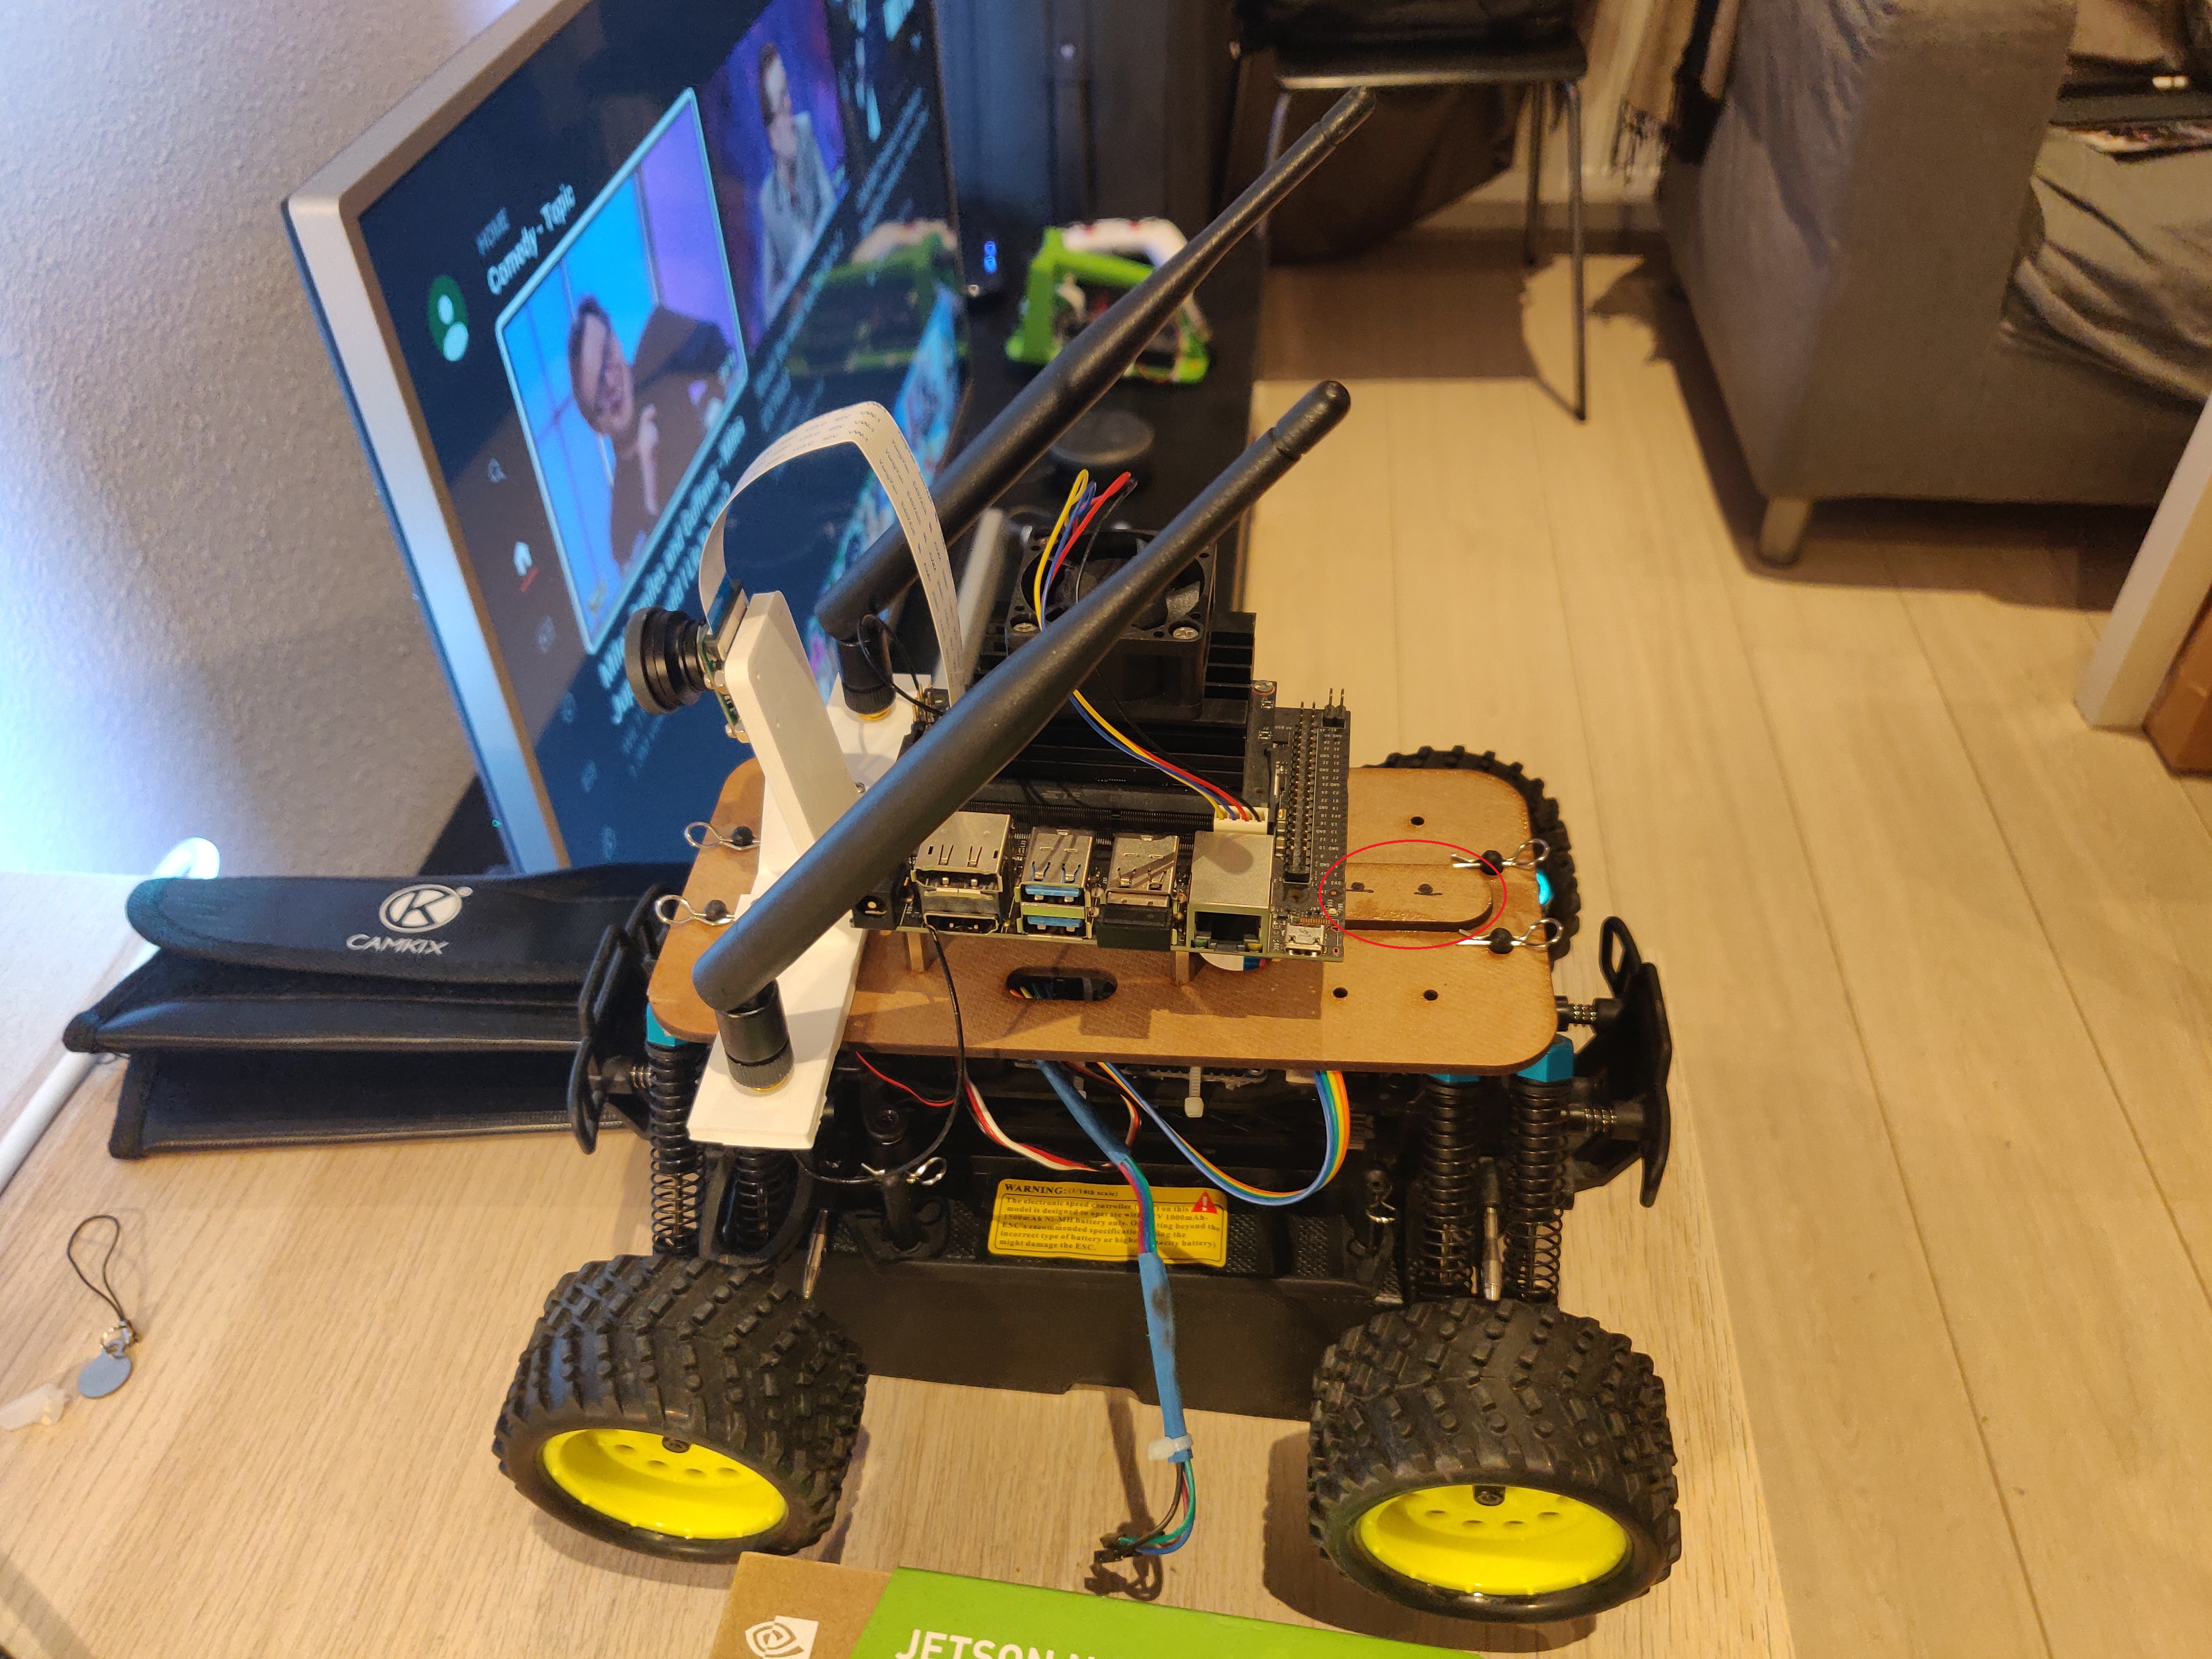
For the base plate, I used the Donkey Car baseplate, which I laser cut out of thick cardboard, since this is just a prototype. The image below shows how the baseplate is connected to the RC car platform. Next step is to finalize the design and get it cut in acrylic.
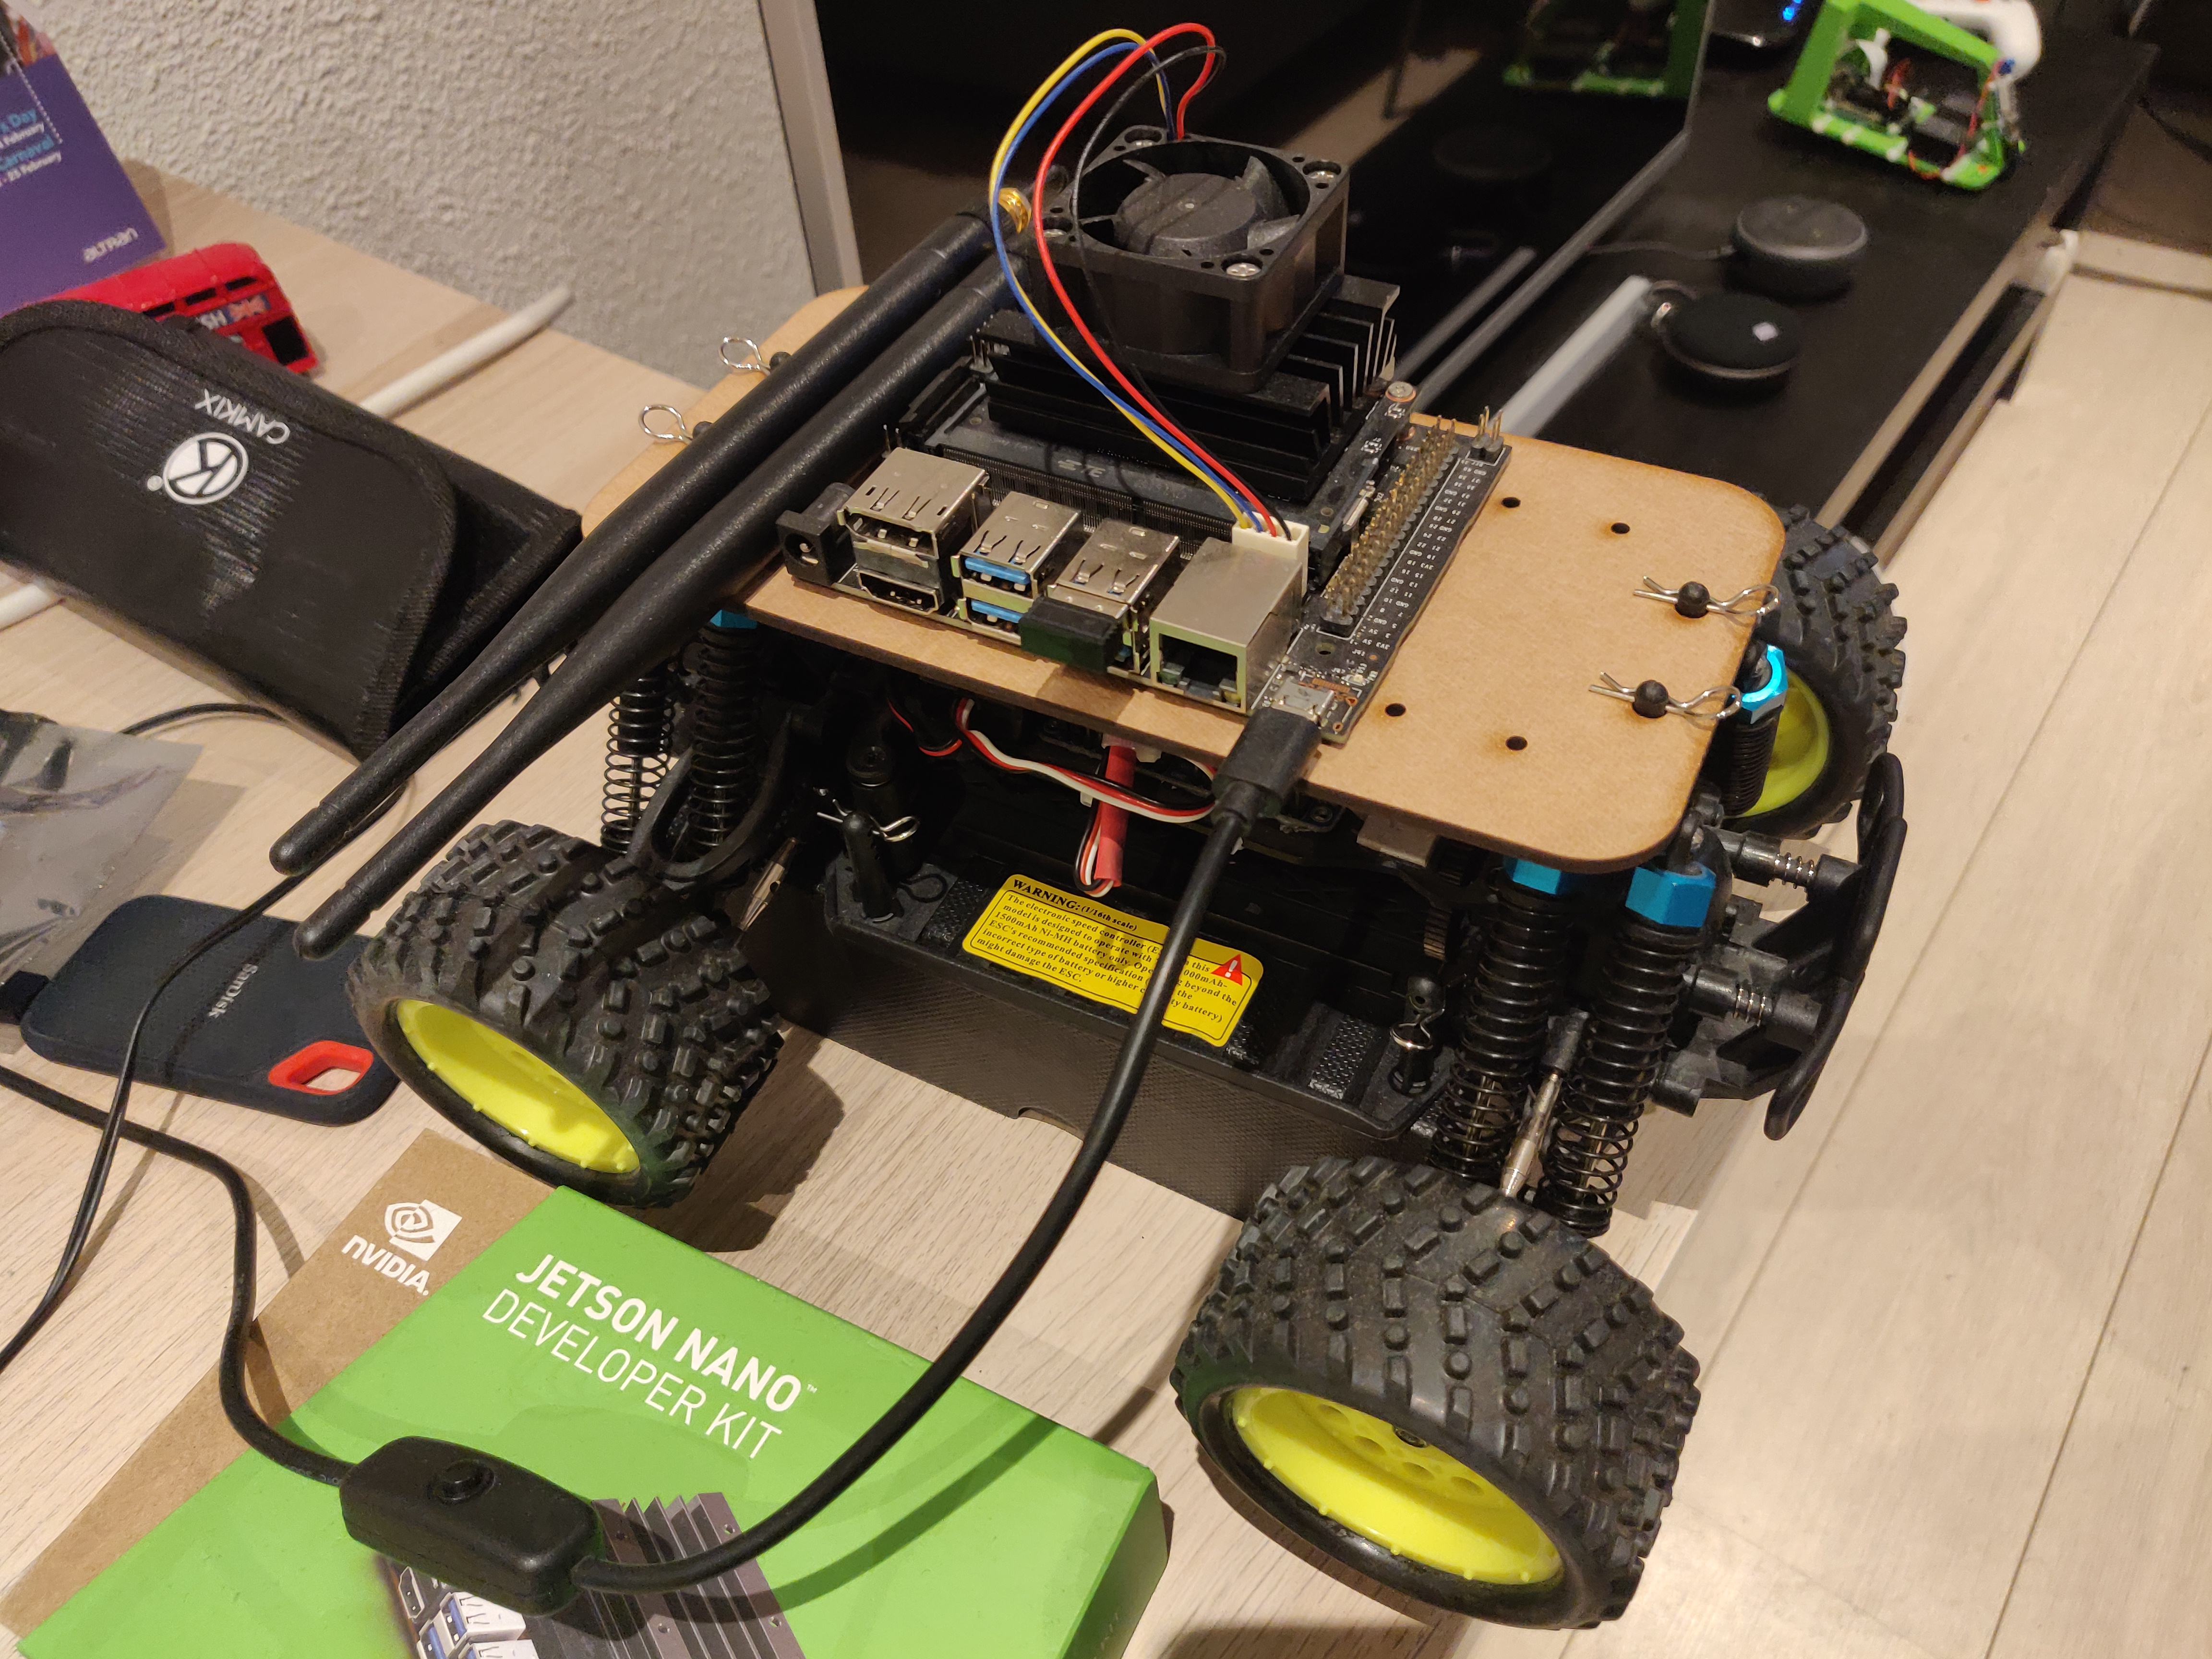
NVidia Jetson Nano and RPi Camera v2:
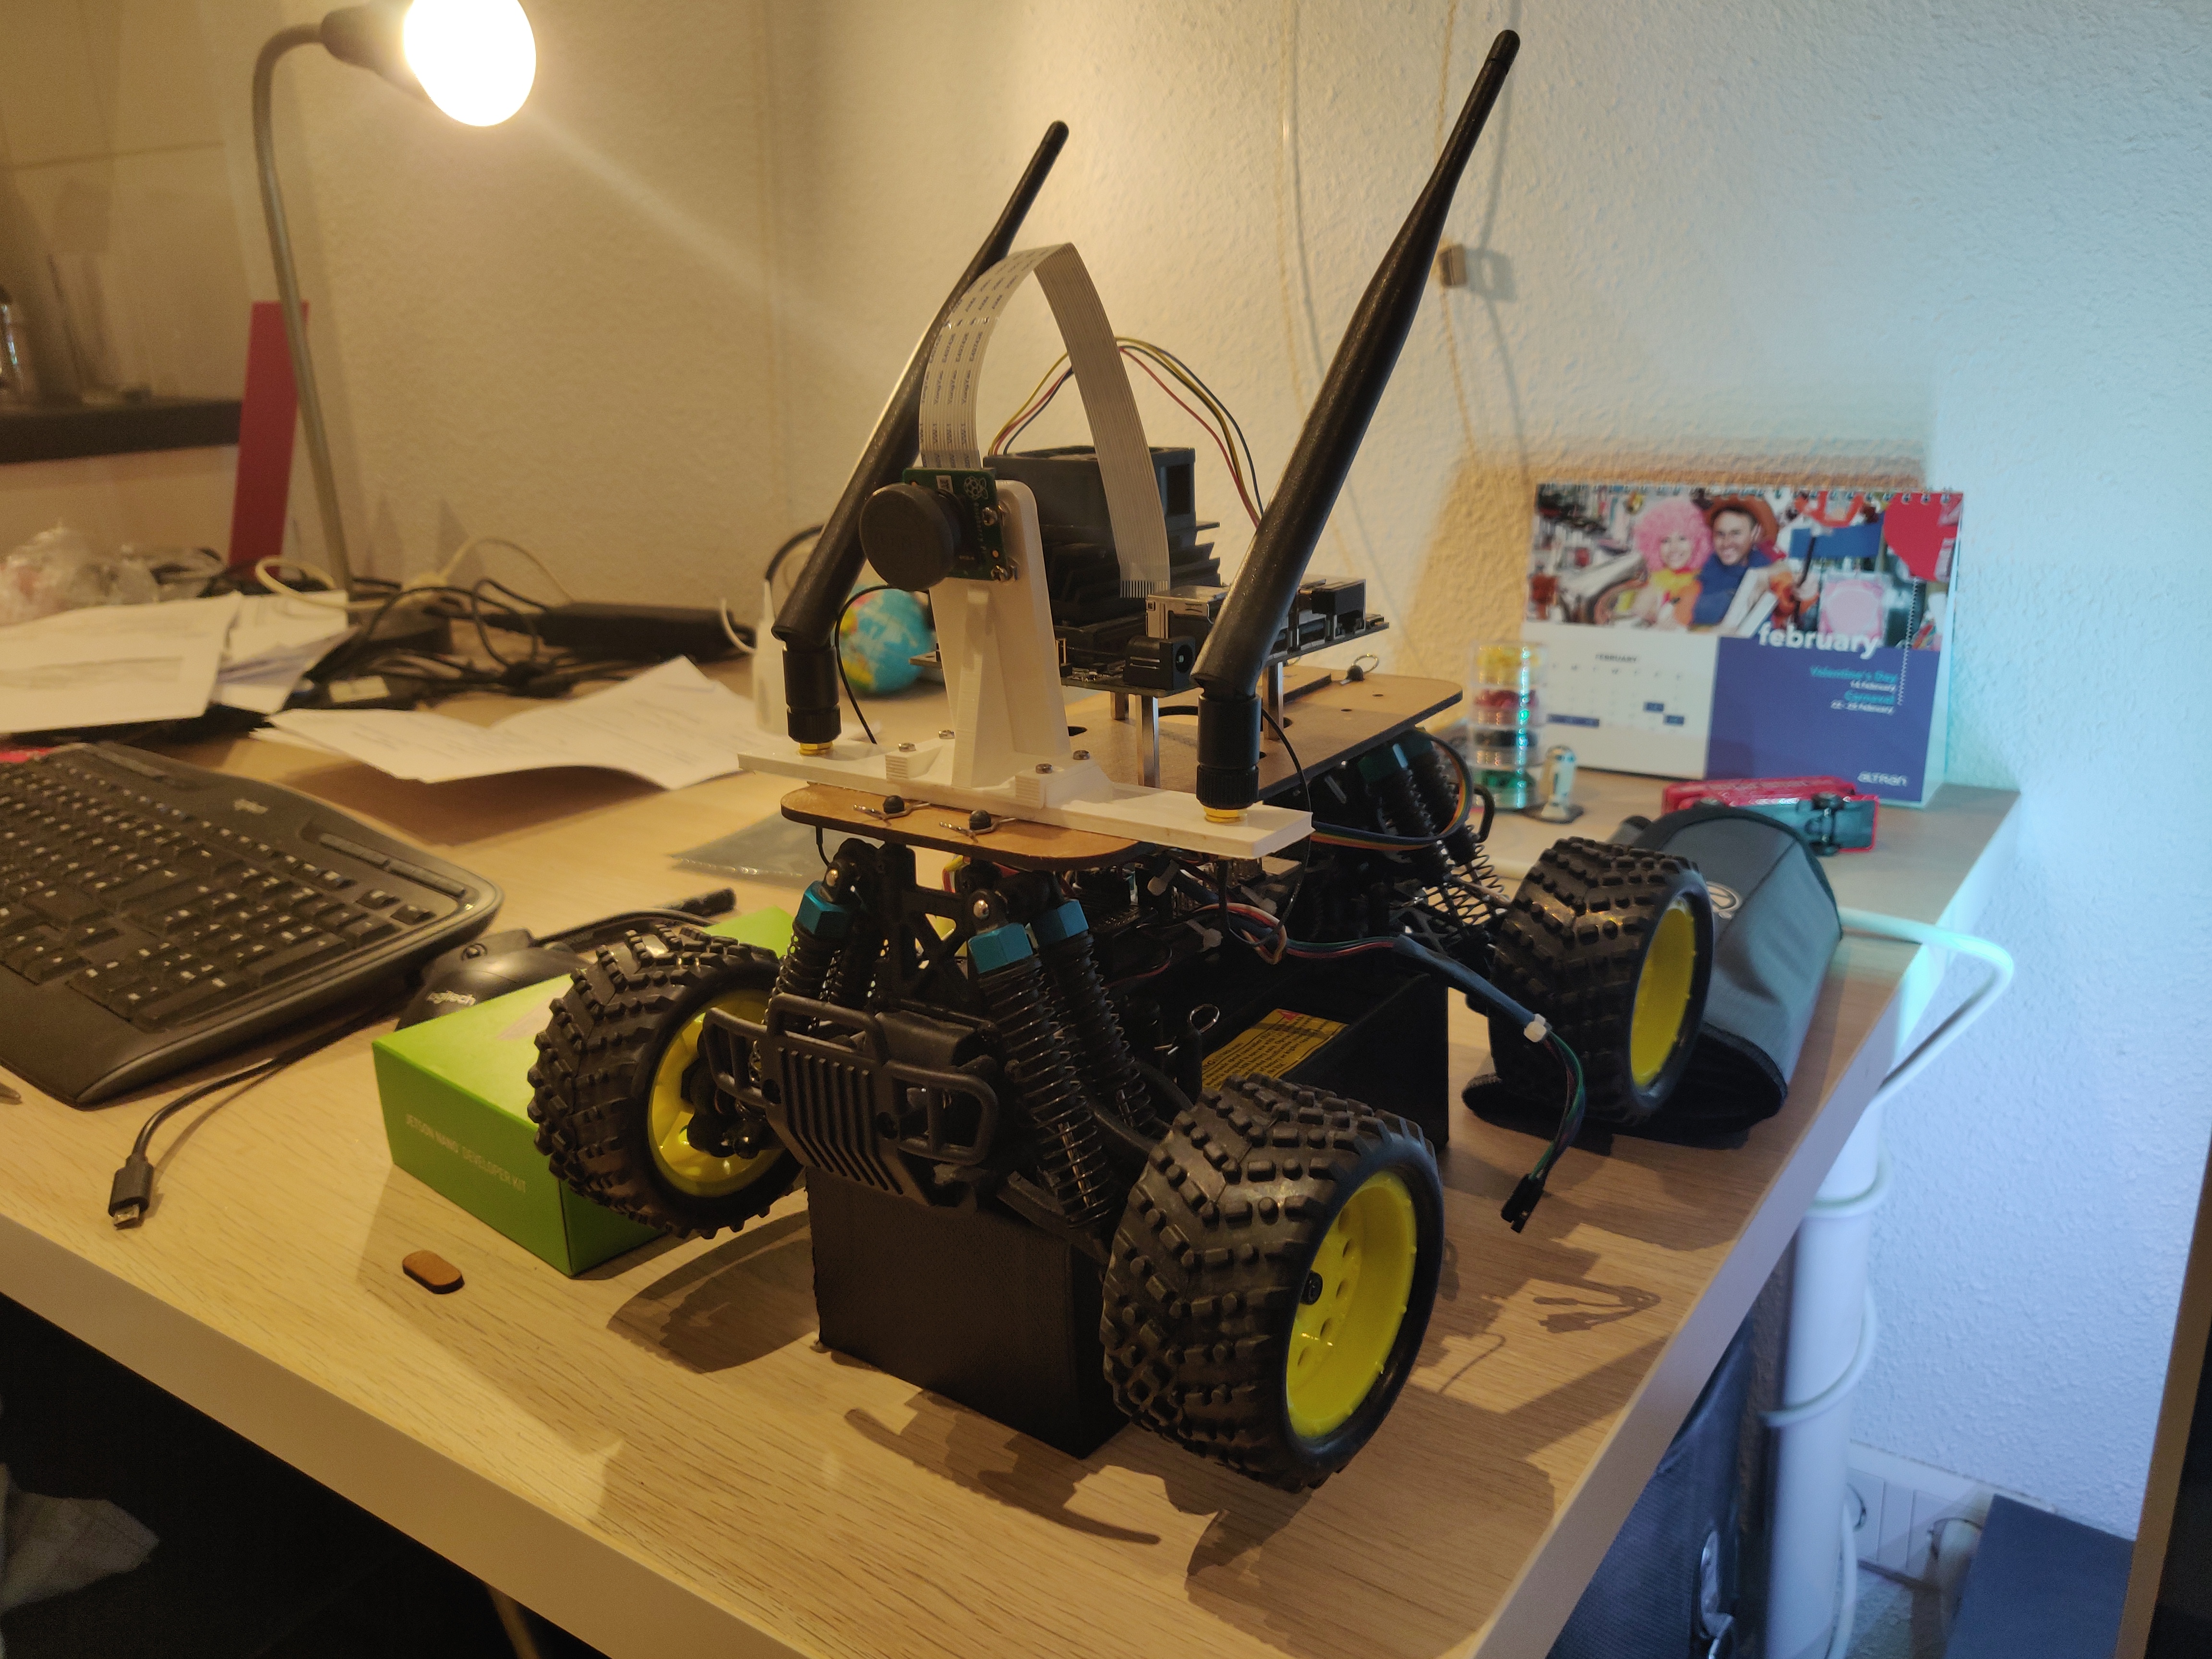
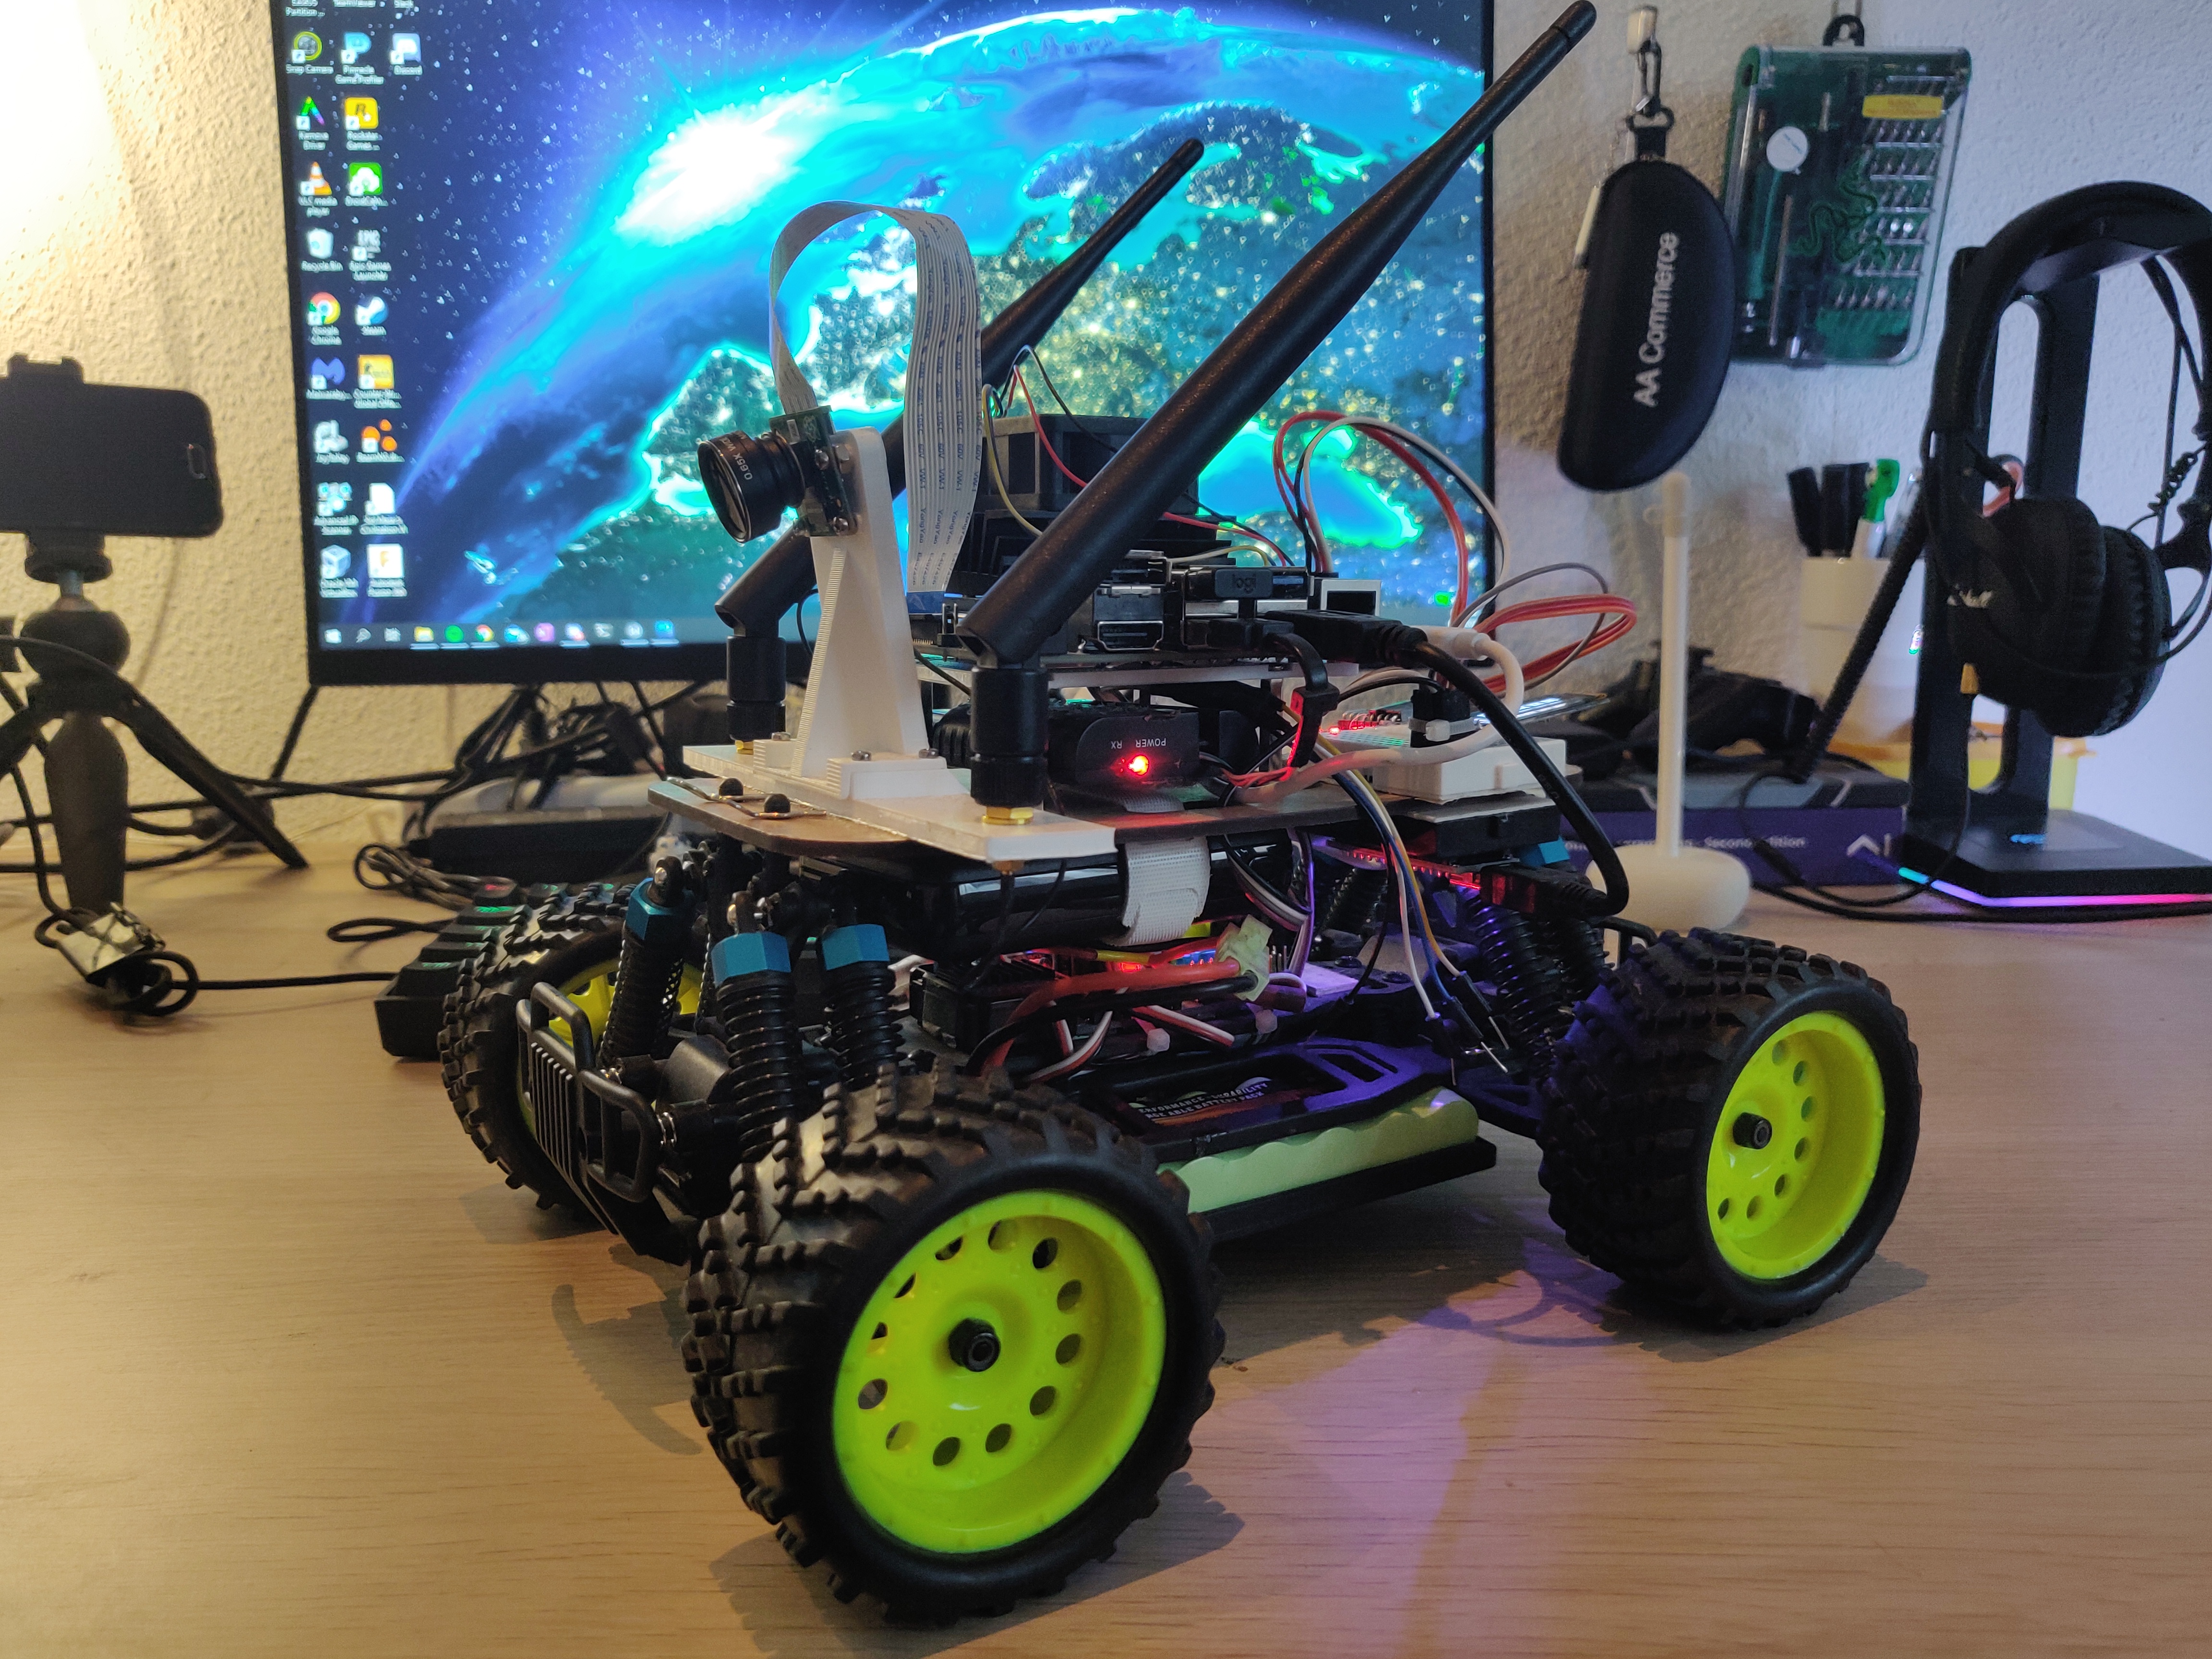
I couldn’t use the Donkey Car roll cage since it encloses the NVidia Jetson once it is mounted. It would have made assembly and modificiations difficult. Meanwhile, I found the NVidia JetRacer, a self-driving RC car platform based on the NVIdia Jetson Nano. I used the JetRacer design files to 3D print a camera mount, which I modified to also mount the Wi-Fi antennae.
The NVidia Jetson Nano was mounted using the Jetson Nano adapter made by the Donkey Car community. Since the Jetson Nano is not compatible with the RPi Camera v1, the RPi Camera v2 was used. A wide-angle lens was added at a later stage.
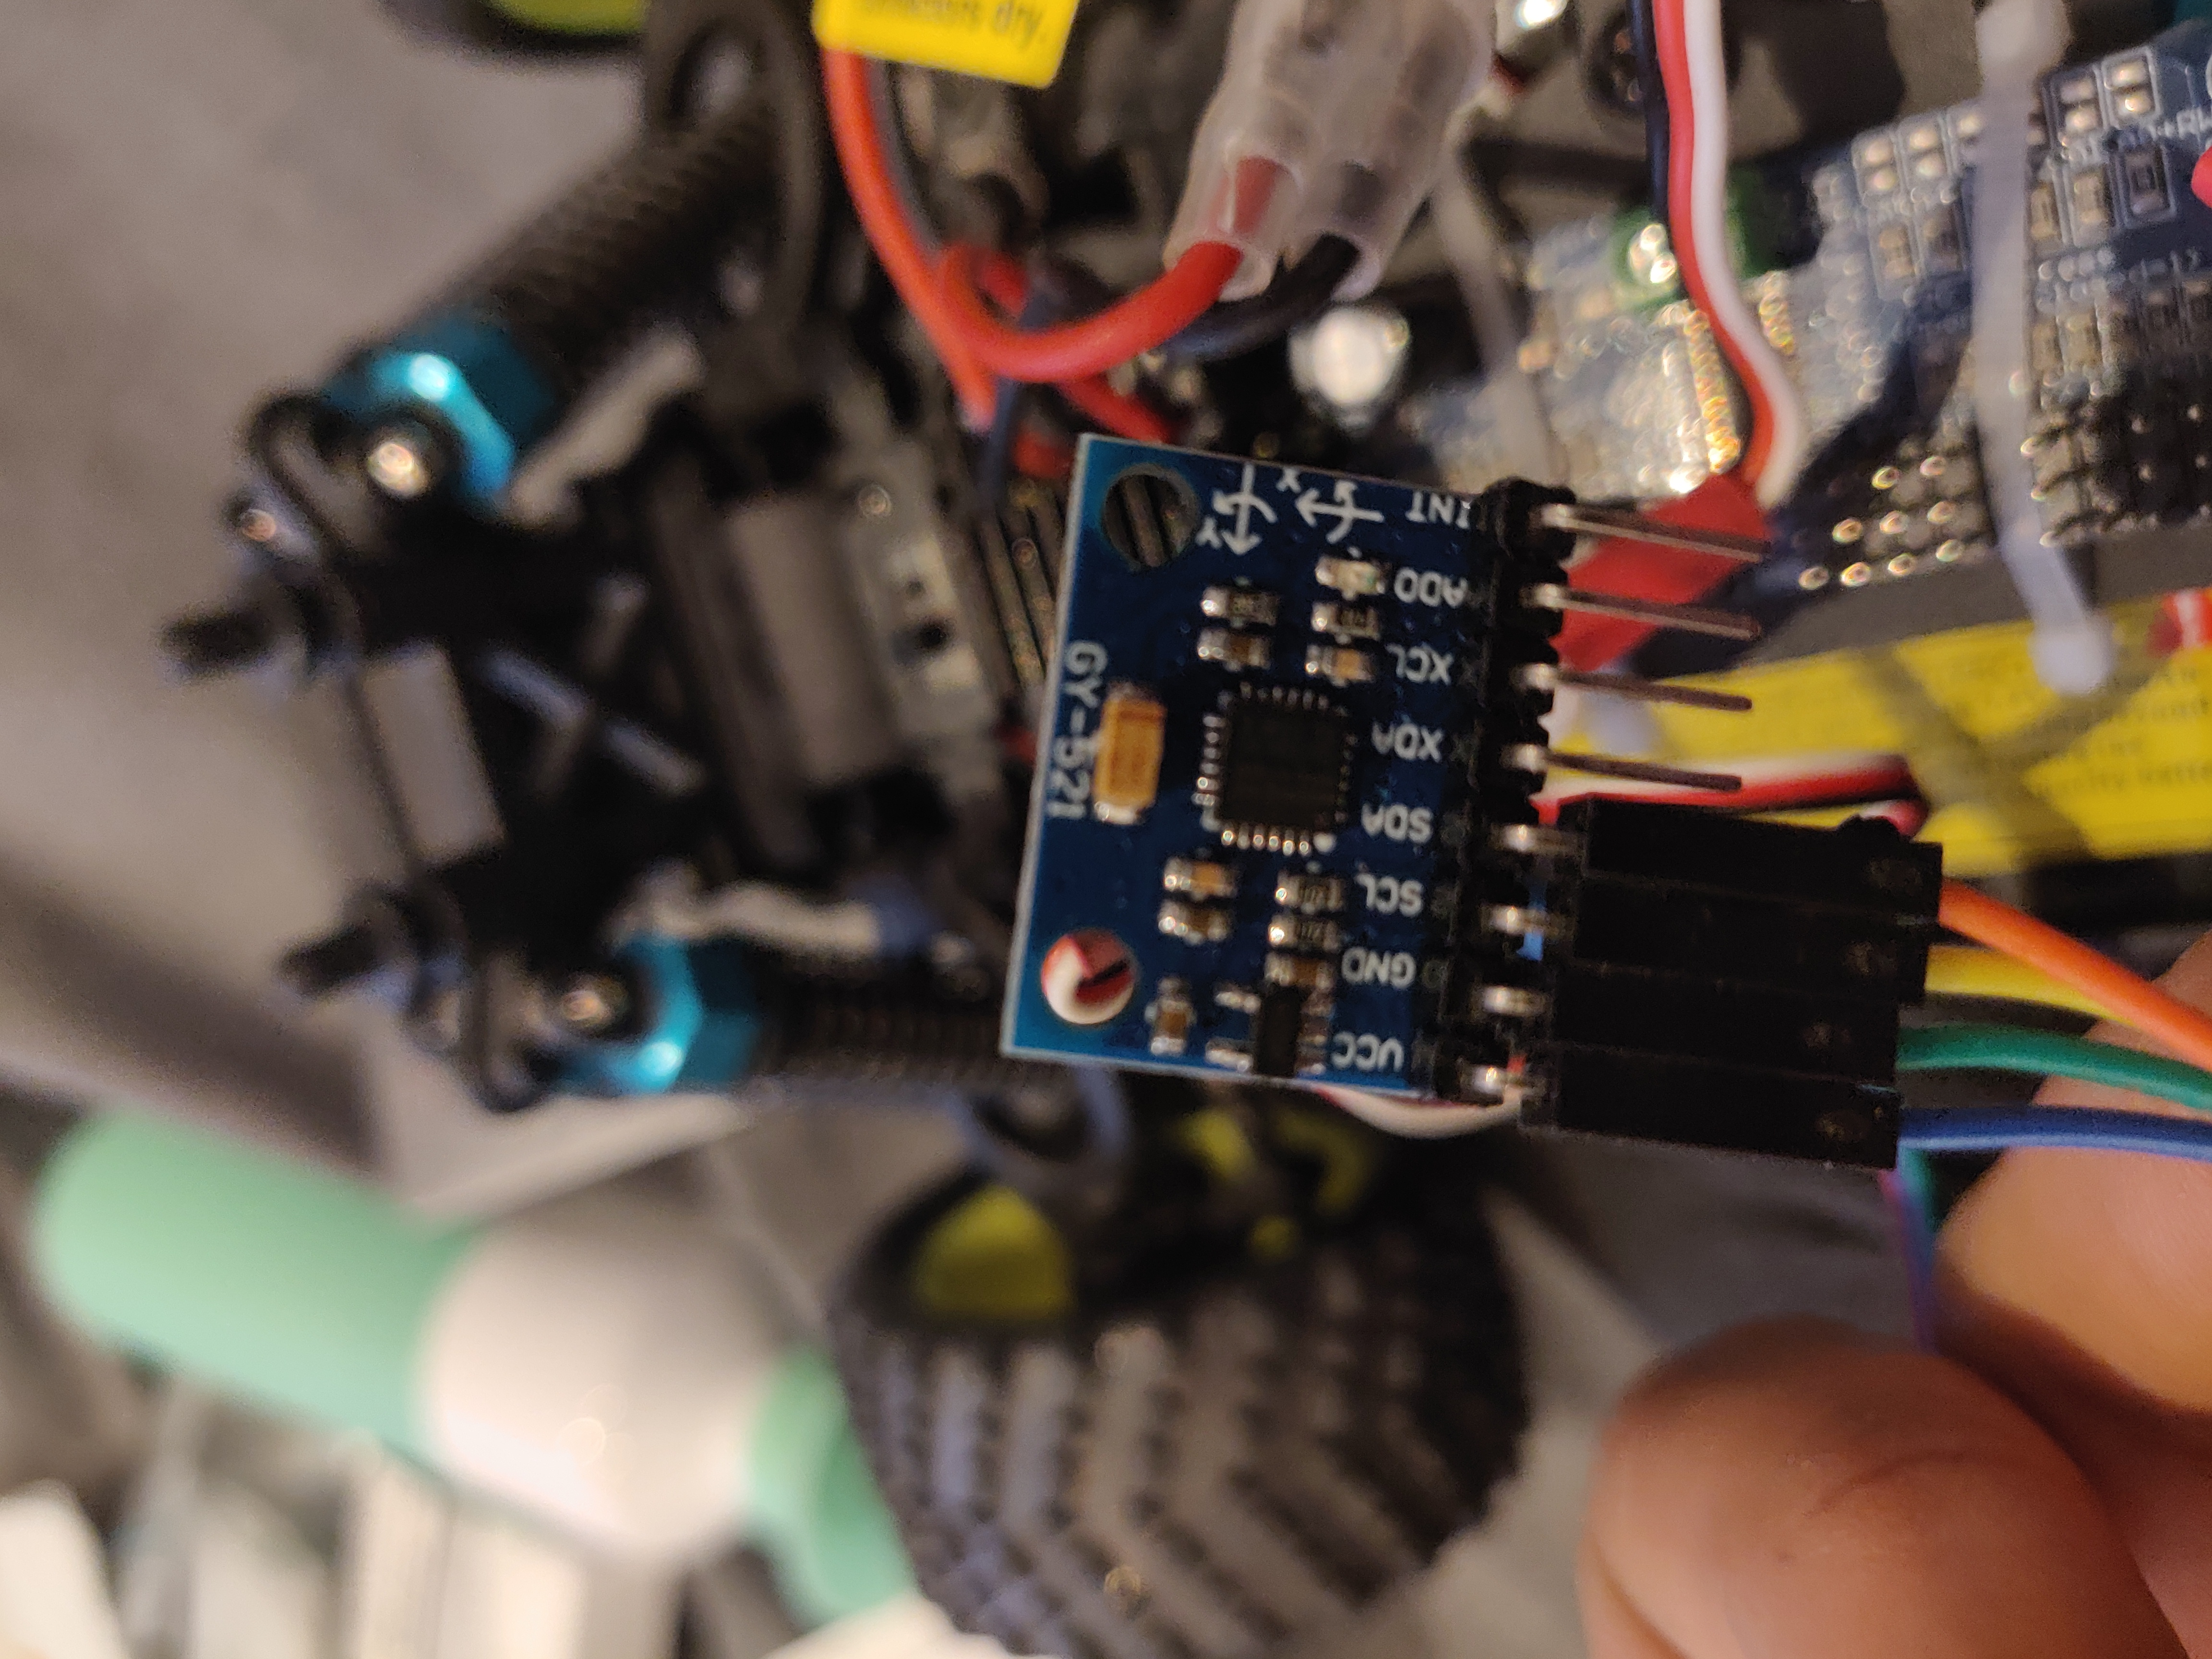
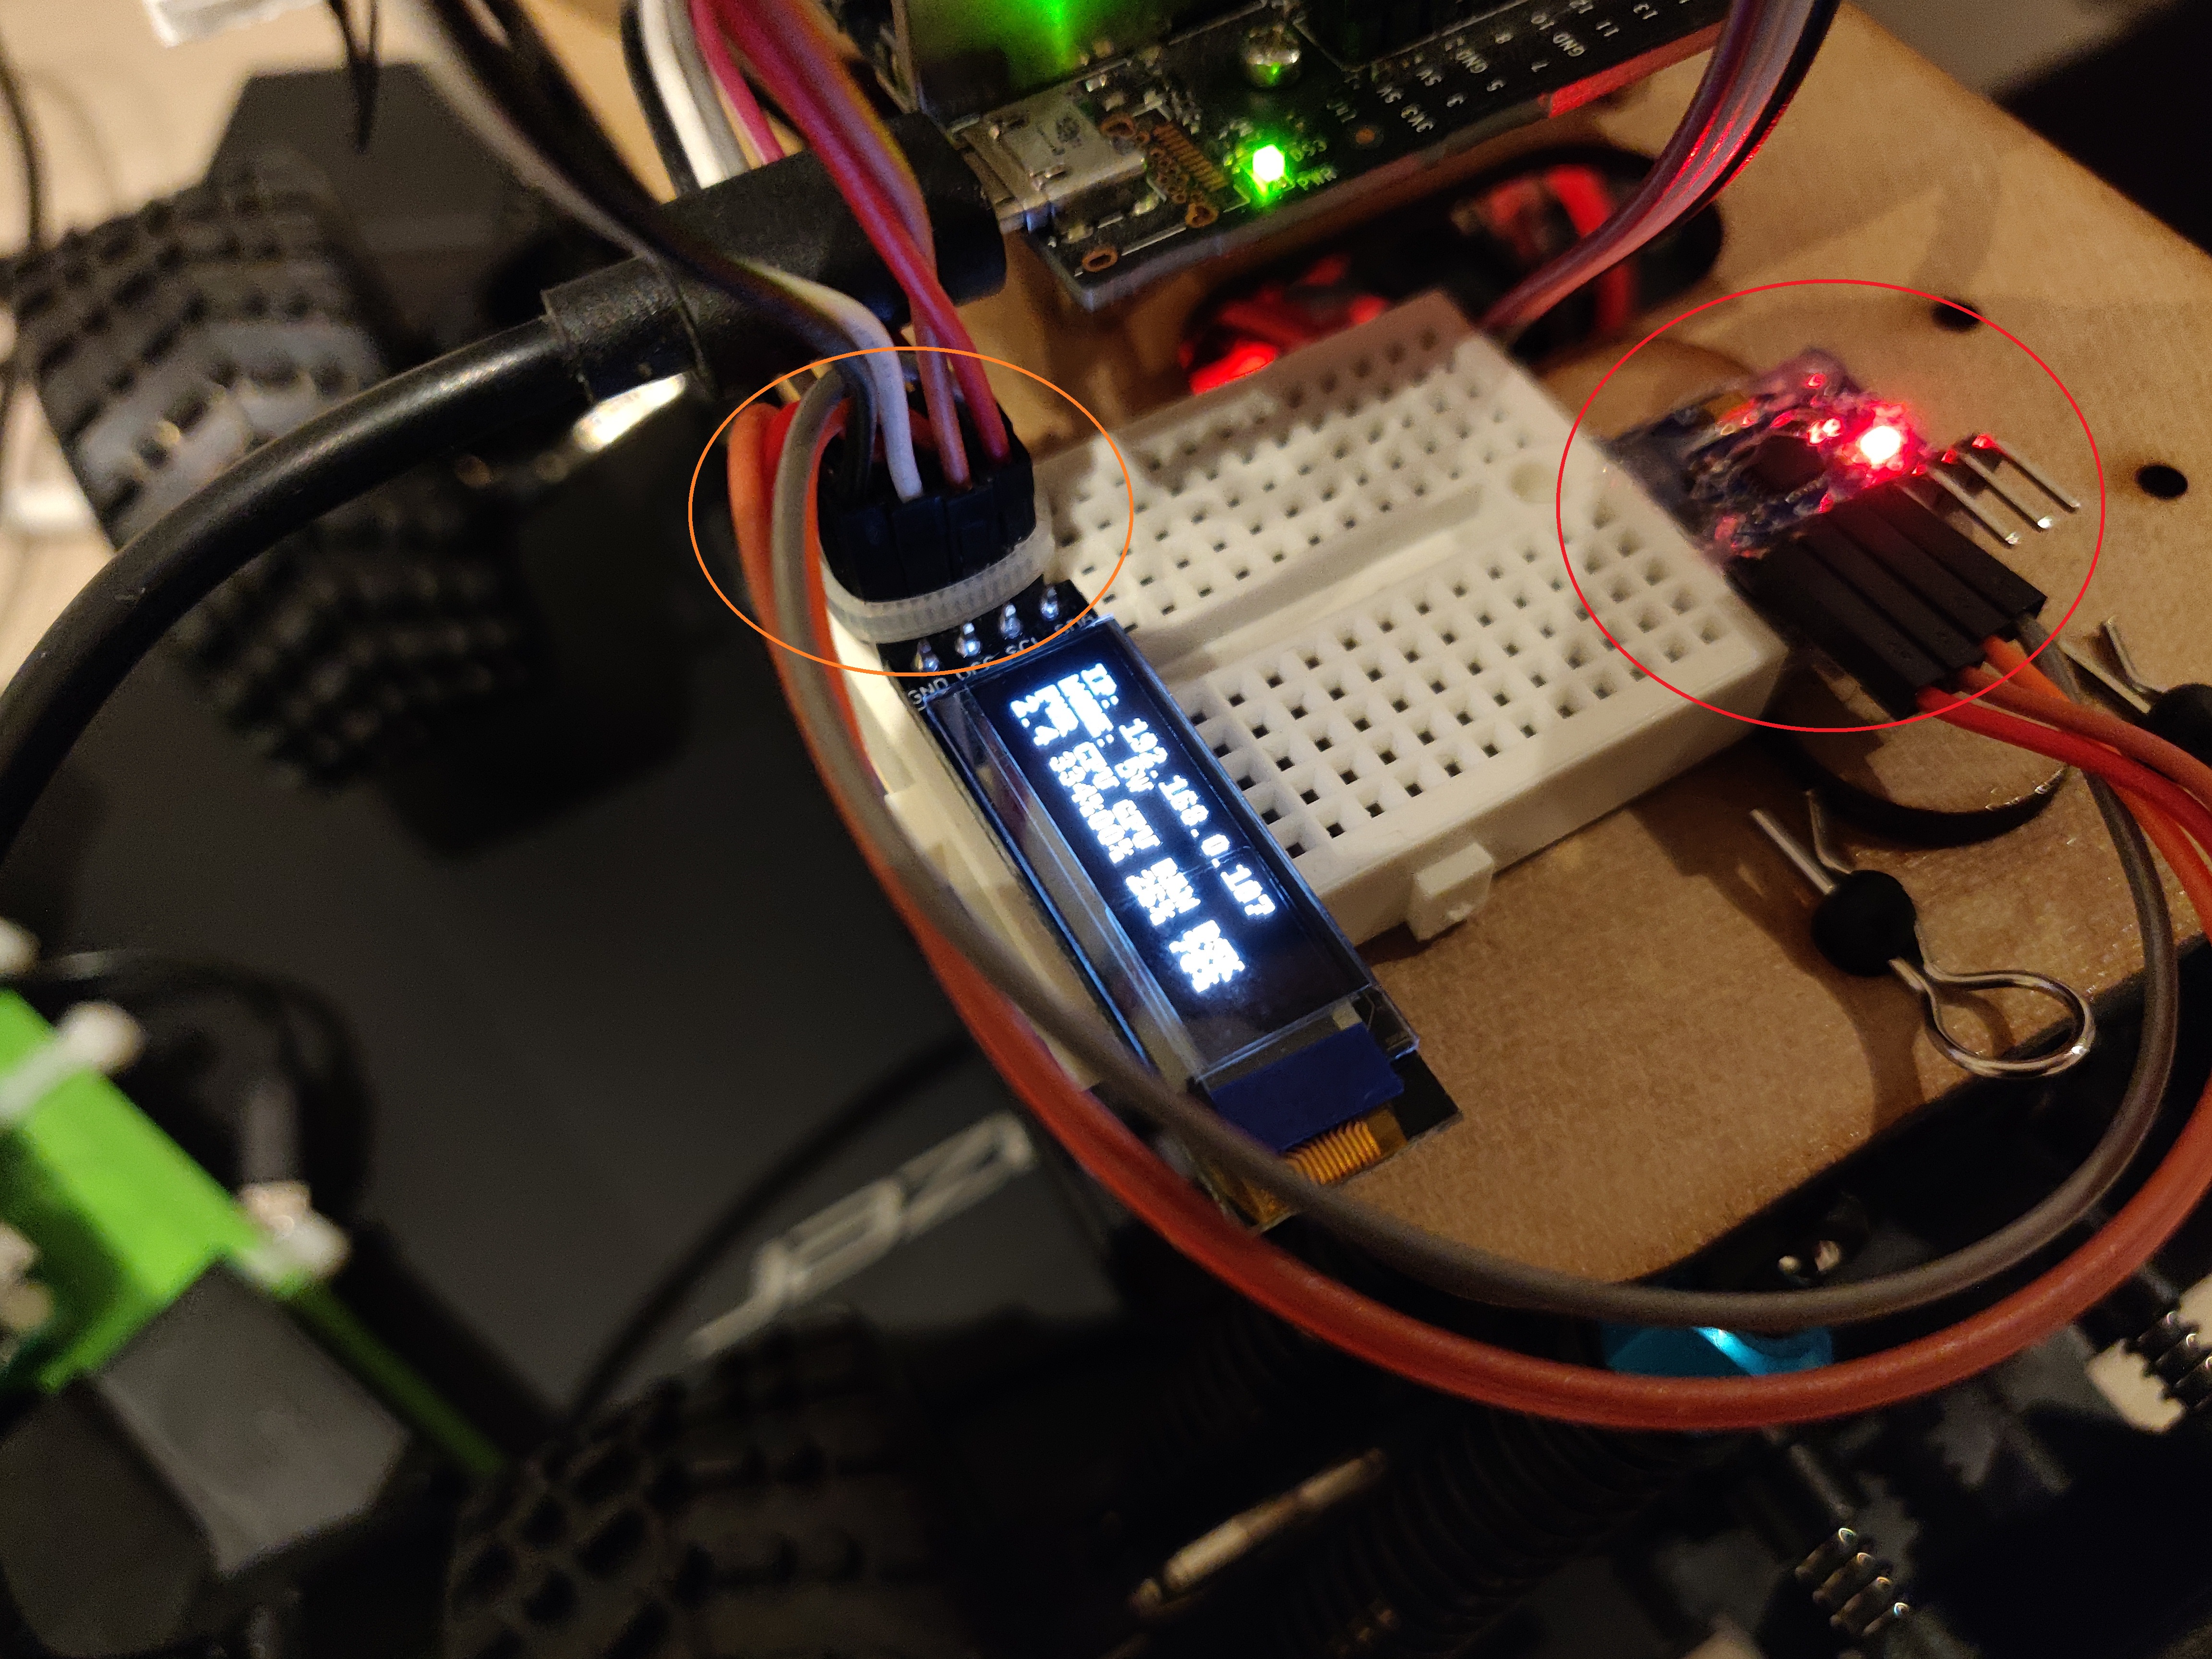
IMU and OLED Display:
The IMU (MPU-6050) and the OLED Display both communicate using I2C. These components were connected to the I2C Bus that also connects to the Servo/Motor Controller. A mini-breadboard was used for the prototype, the next step is to design a Jetson Nano shield or a separate PCB.
Odometry (Hall Effect Sensor and Arduino):
Odometry was implemented using a set of 7 magnets with a hall-effect sensor. The magnets were attached to a 3D printed disk that was then attached to the drive shaft as shown in the photo below. The CAD files for this attachment can be found here.
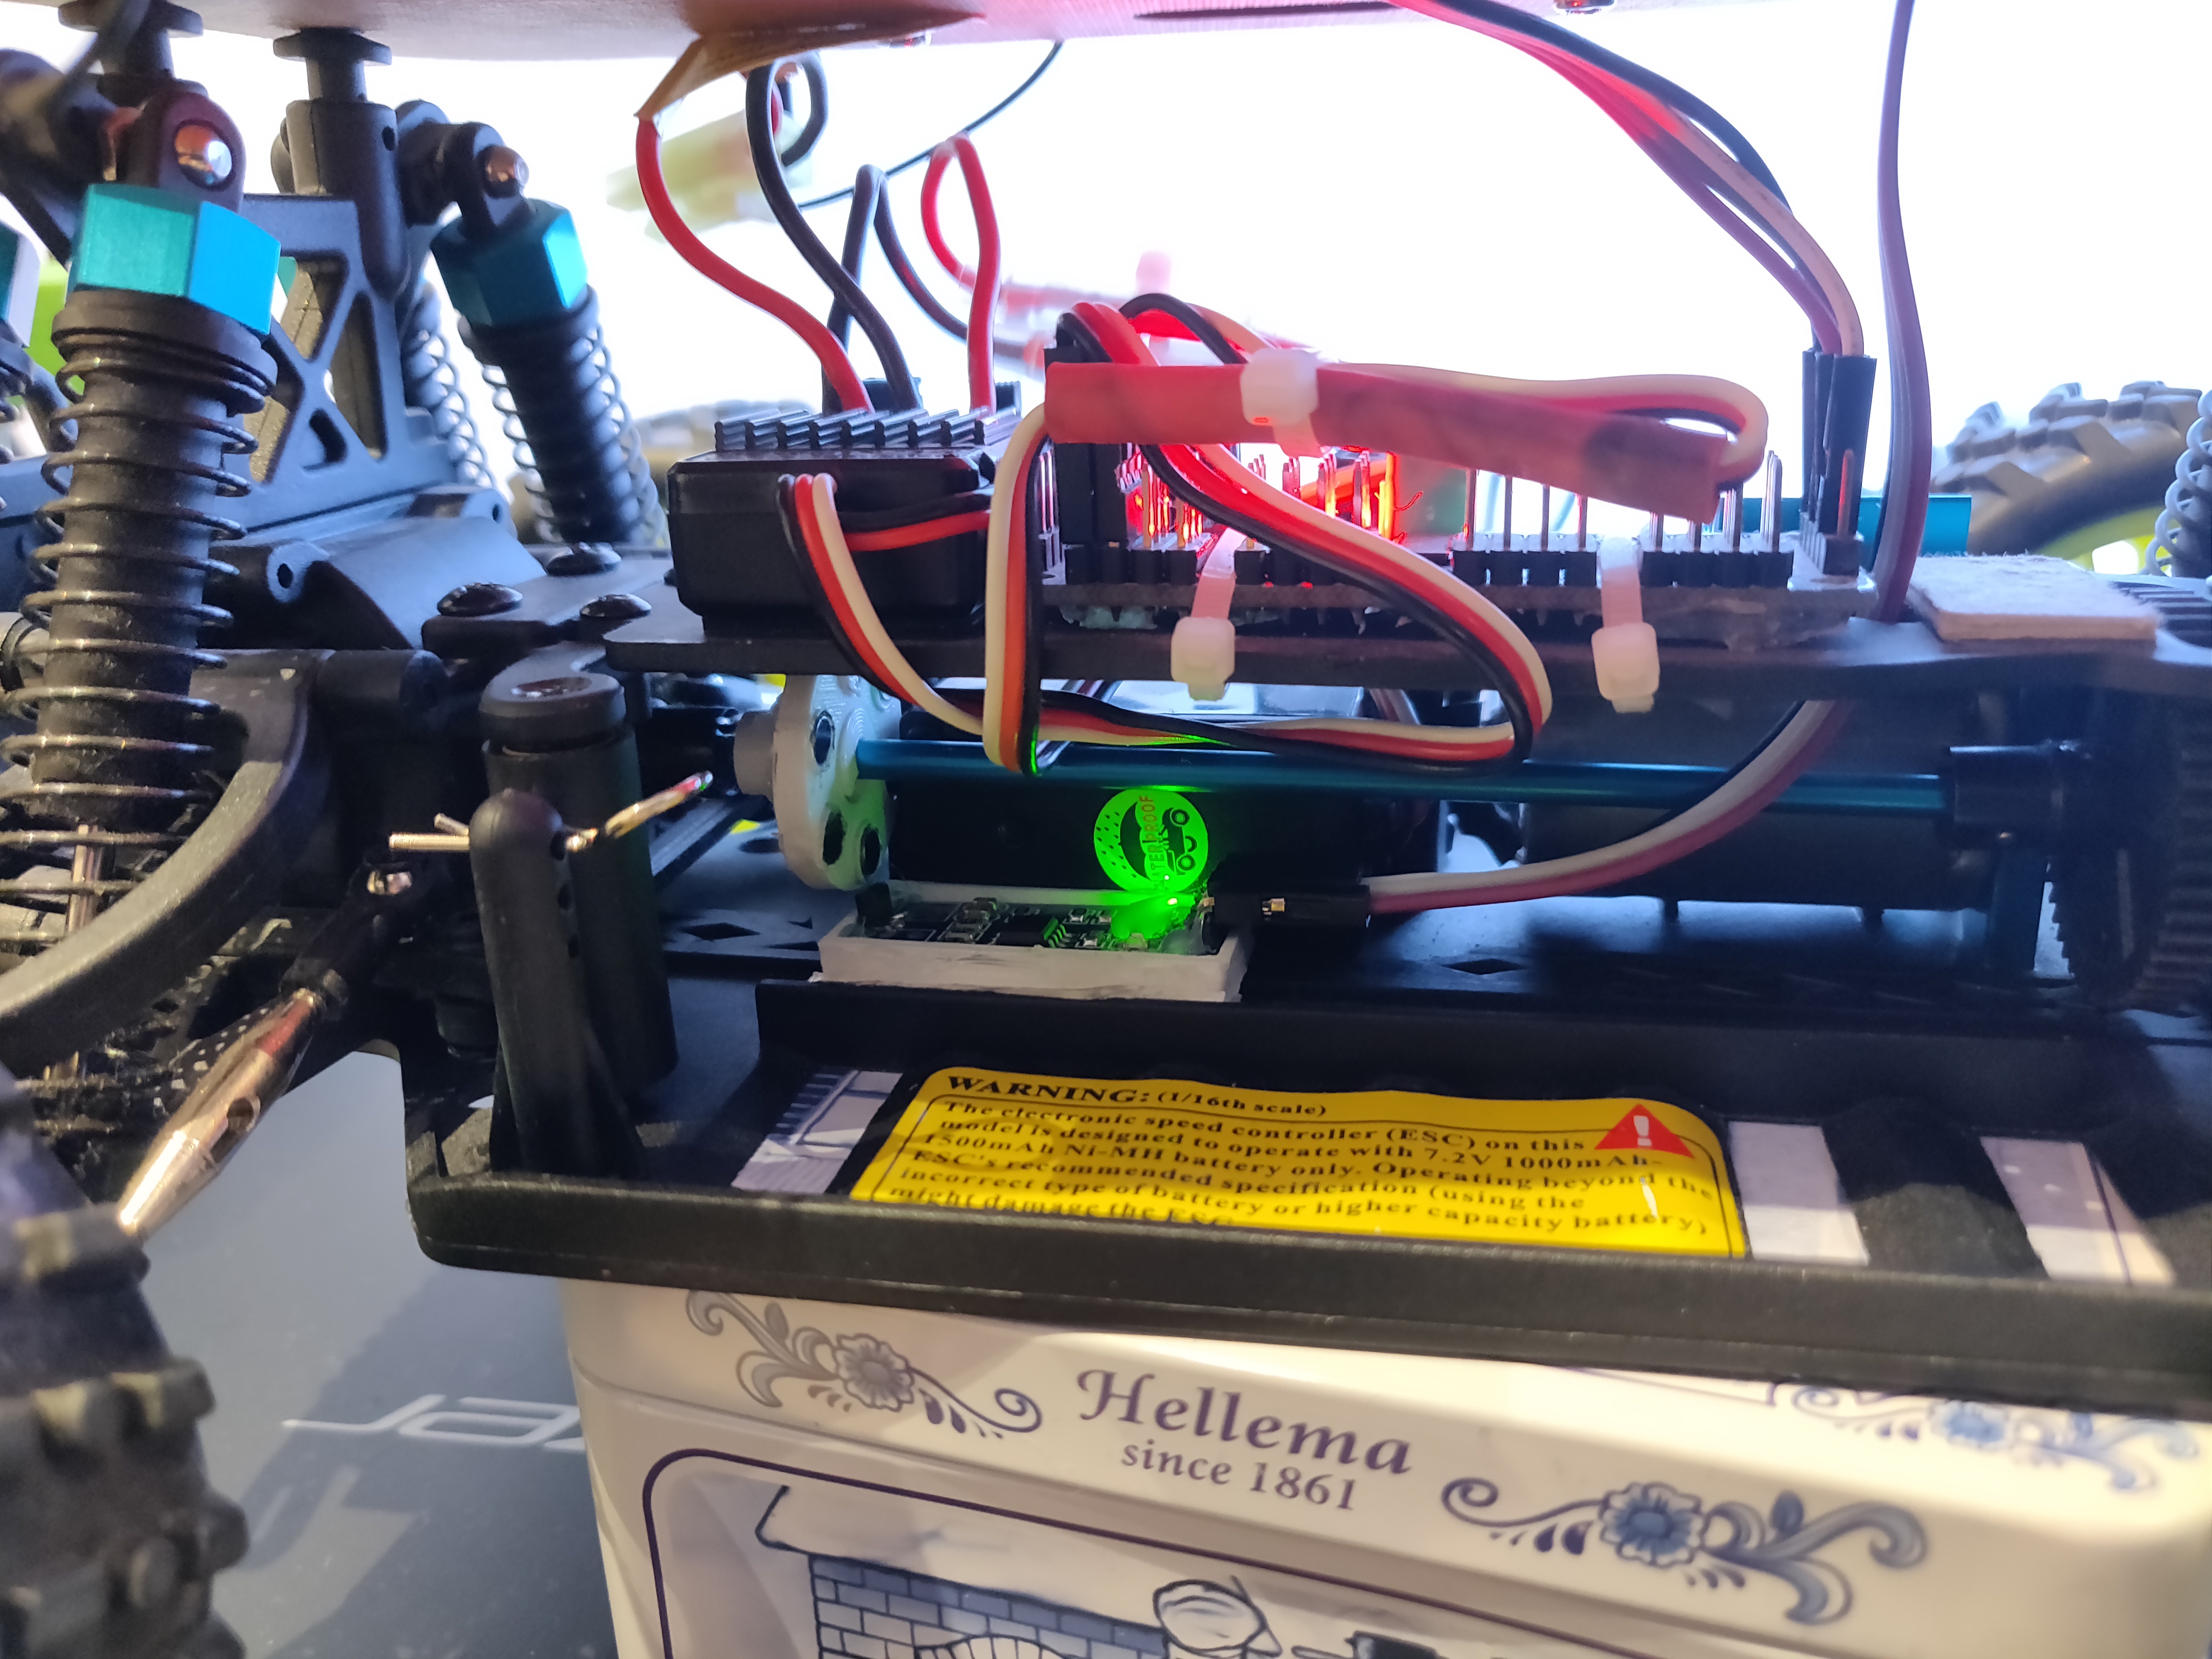
The hall effect sensor works on 5V, while the Jetson Nano provides only 3.3V. I did not have a voltage level converter lying around, so I decided to connect the odometry sensor with an Arduino Nano, which is then connected to the Jetson Nano via USB.
Battery Pack
To power the Jetson Nano, a 10000 mAh battery pack was used, which was attached using a velcro strap to the bottom of the baseplate.
Raspberry Pi GameHat
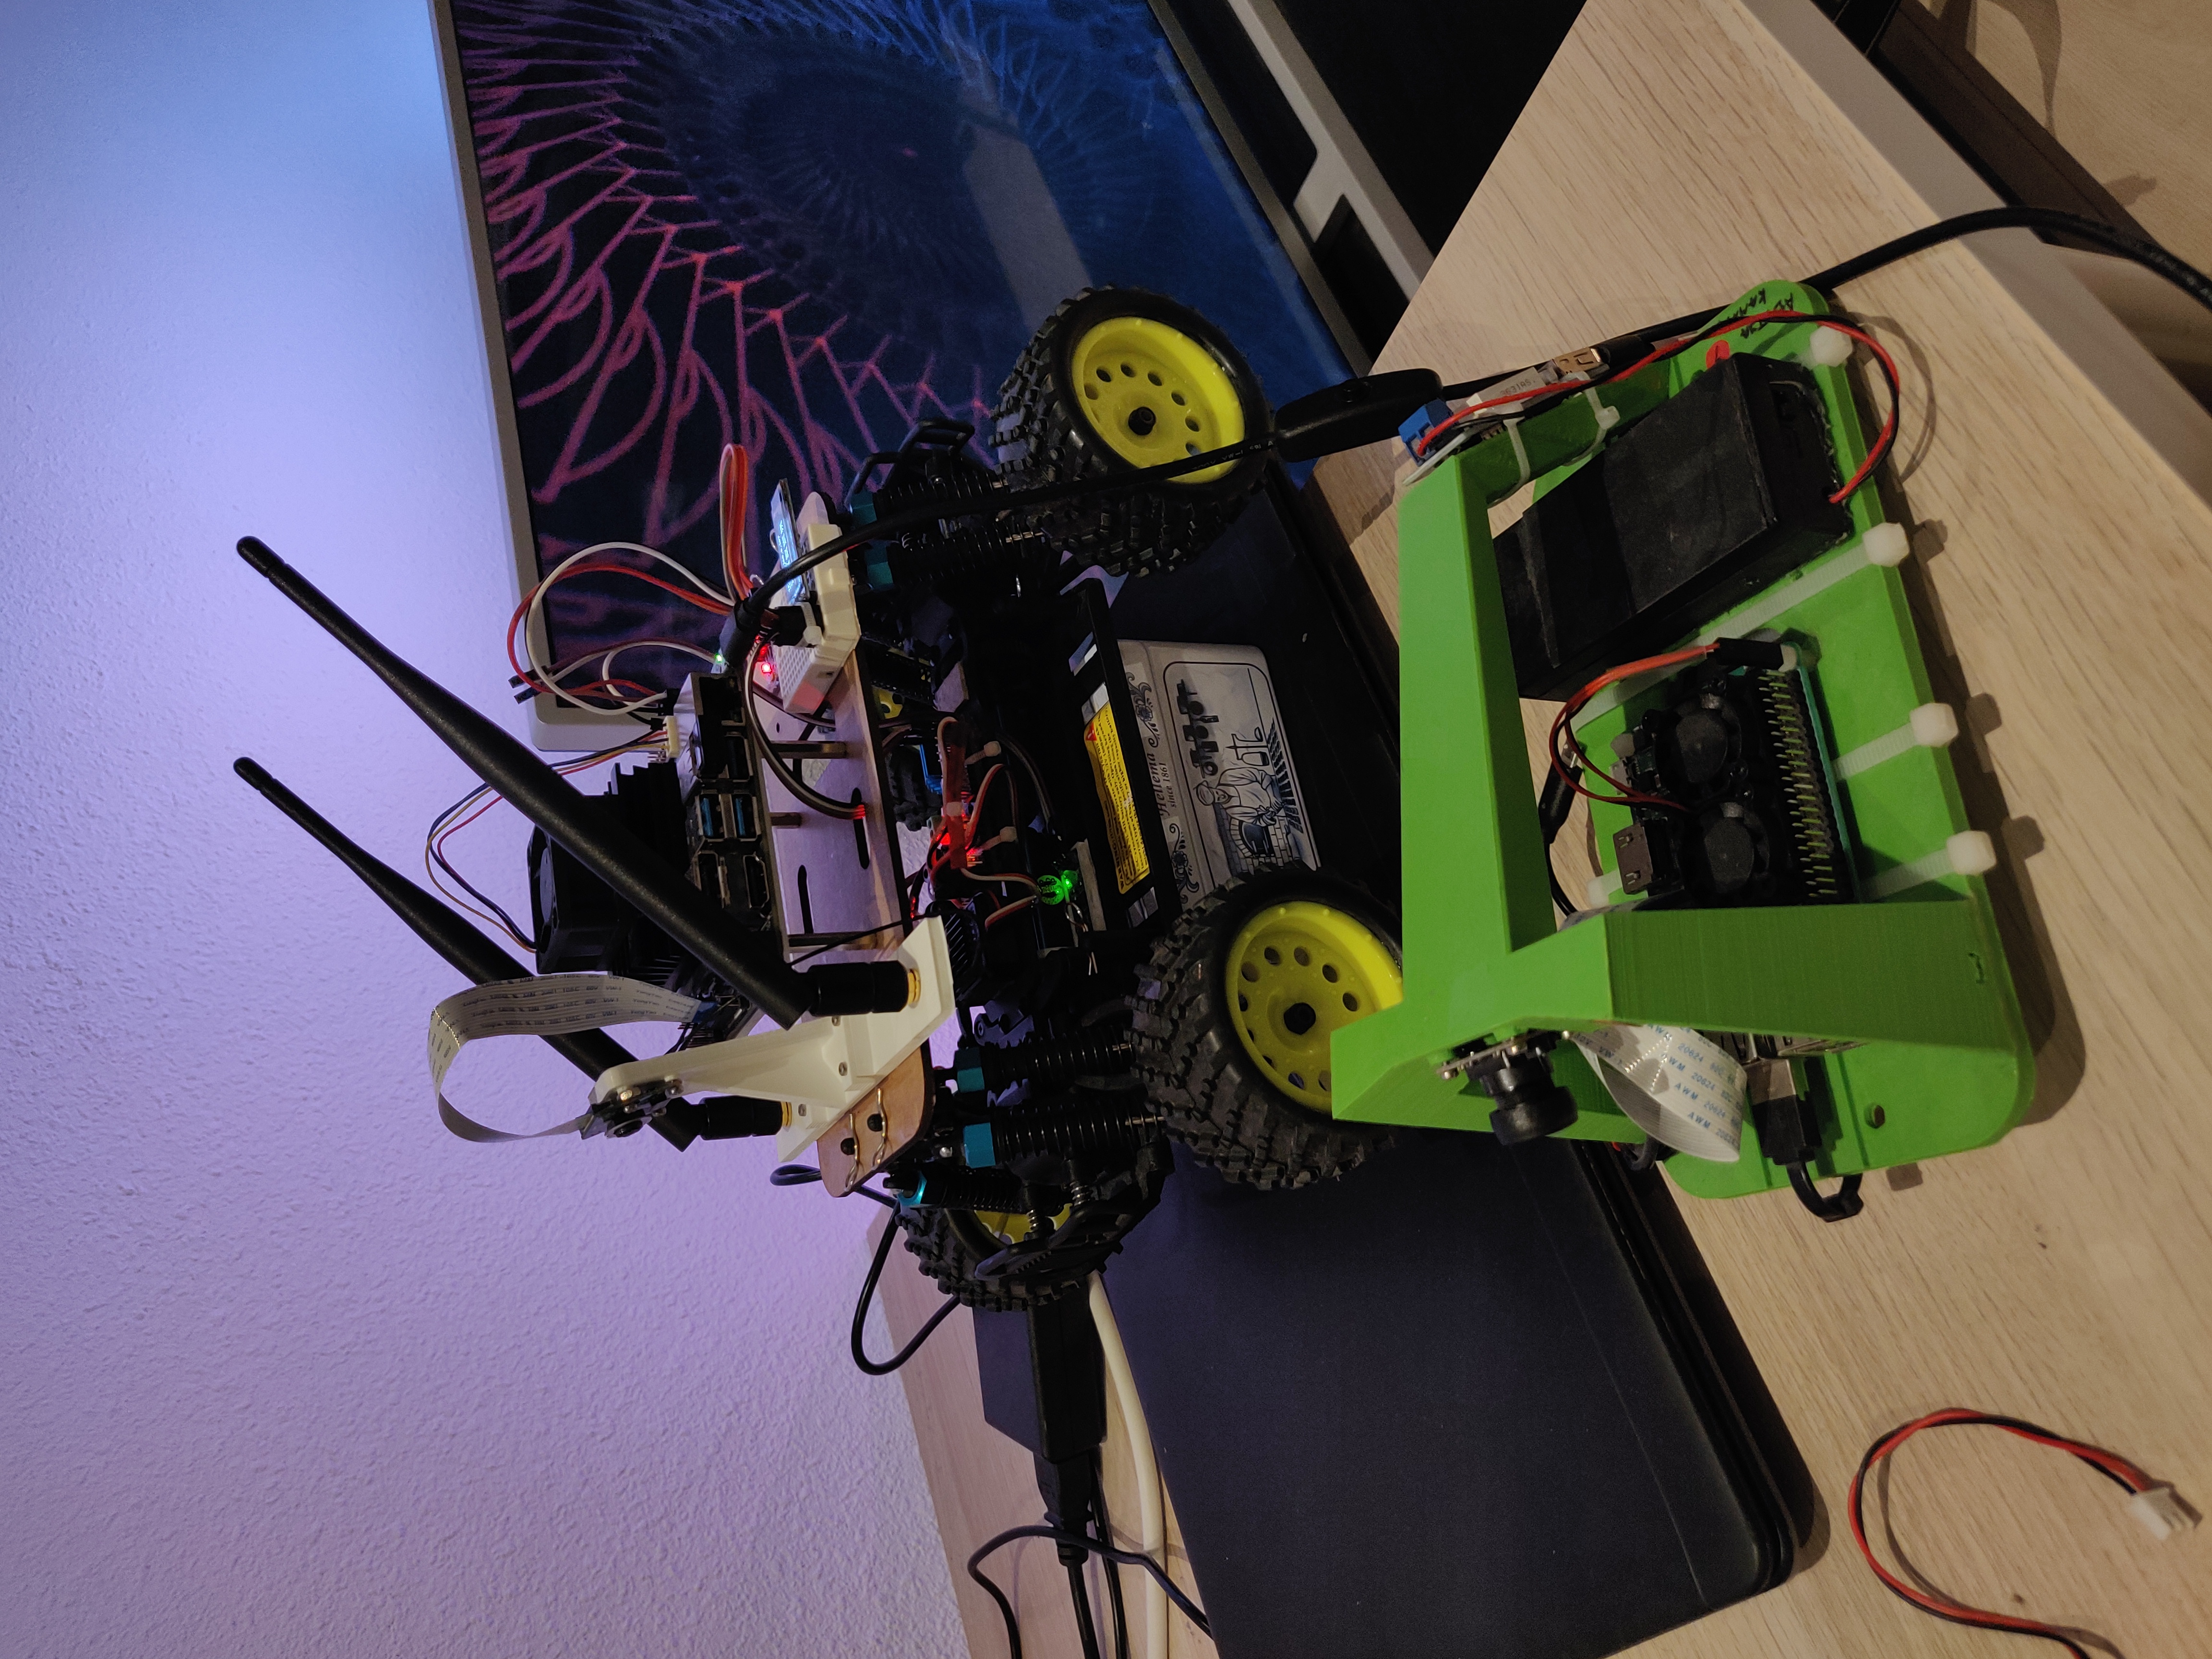
Finally, the Raspberry Pi from the old Donkey Car was used with a Waveshare GameHat shield. I plan on using this as a POV teleop controller but haven’t had a chance to work on it yet. For now, the Raspberry Pi acts as a ROS client machine which connects over WiFi to the ROS master on the Jetson Nano. This allows me to access the camera info and visualize the camera image on the GameHat as shown in the photo below. More on this in later posts.

Fully Assembled Car
After all the modifications, the fully assembled car looks like this.
Software Changes
The Robot Operating System or ROS (ROS1 Melodic) was installed on the Ubuntu 20.04 running on the Jetson Nano. ROS is a middleware that acts as an abstraction layer between the hardware and software, and as a communication layer between multiple software processes, also known as nodes. For now, the following nodes are implemented:
- Camera Node: Provides an image stream from the CSI camera interface (processed and analyzed later using CV and ML)
- Joystick Node: Reads the sixaxis joystick input from the USB receiver and provides velocity inputs to the low level control
- Ackermann Steering Node: Reads linear and angular velocity commands from the joystick node and provides control input to the throttle and steering motors
- PWM Controller Node: Reads control inputs and provides PWM signals to the motor driver via I2C.
- IMU Node: Provides IMU readings (used later for localization)
- Odometry Node: Reads data from the hall-effect sensor and provides odometry readings (used later for localization)
Workspace Setup
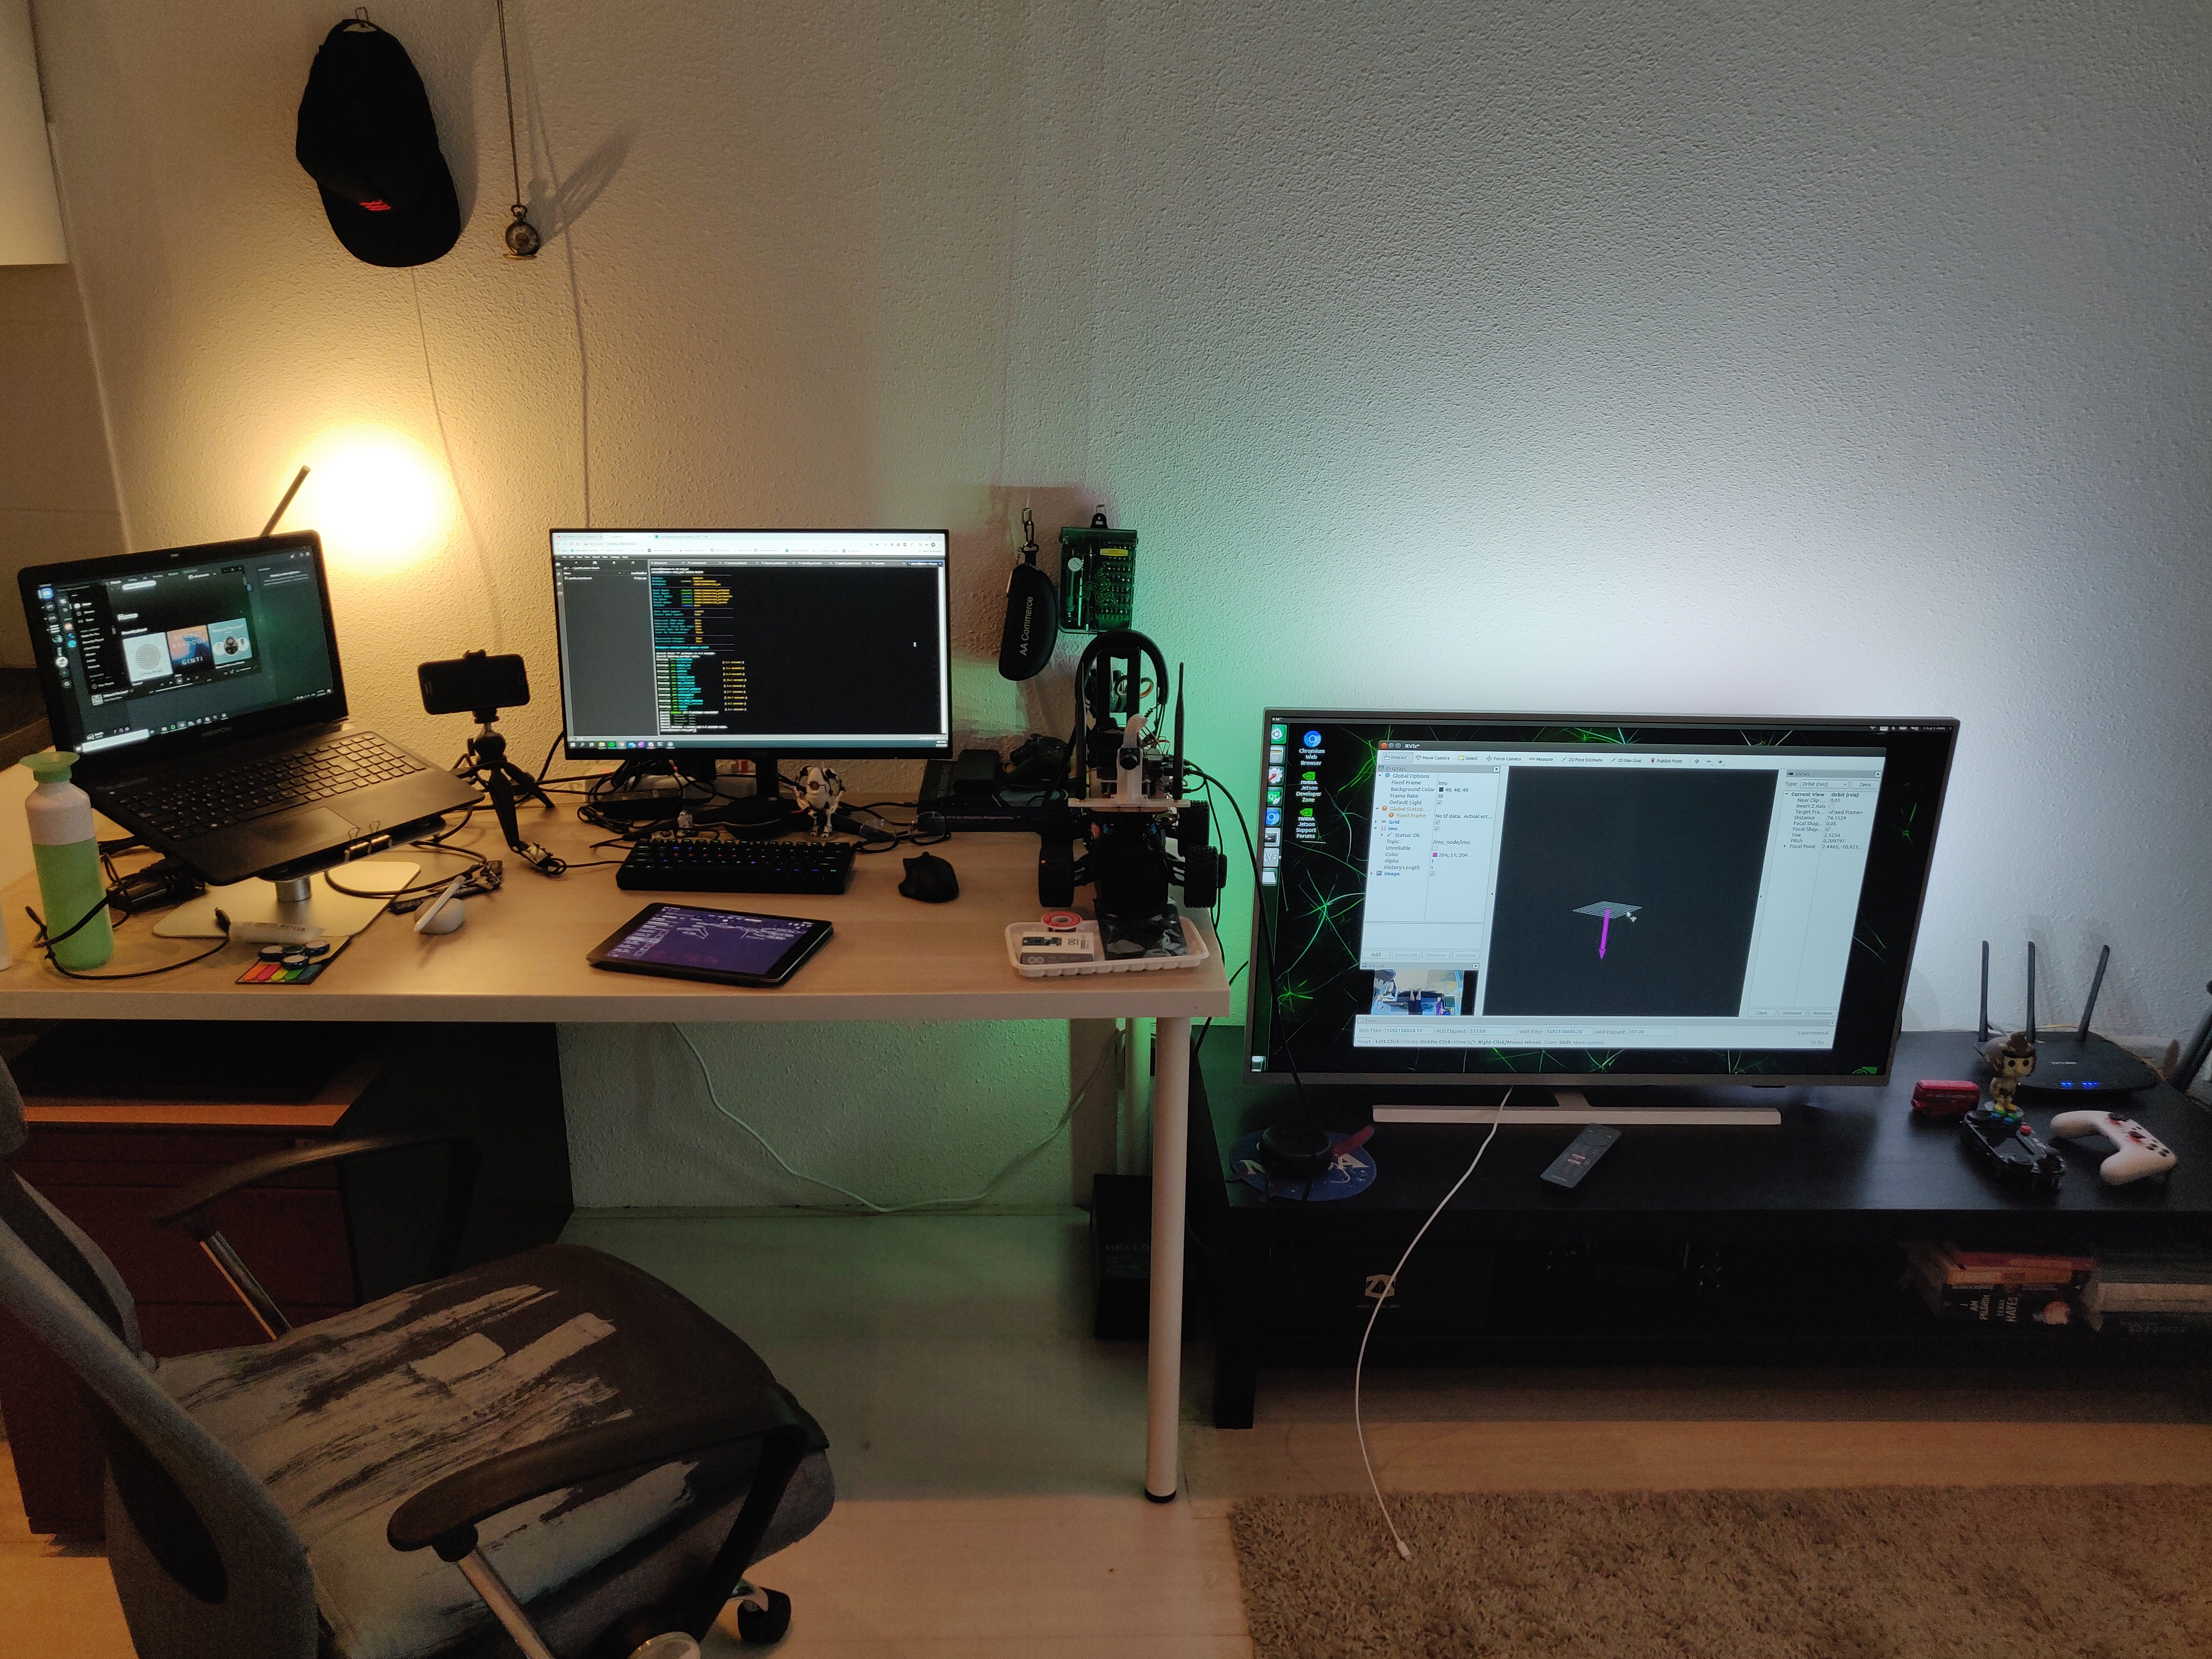
Since I work full time from home now, I have also done some much needed upgrades to my work station. I now have an additional screen for my laptop, from where I can connect remotely to the car via WiFi. For visualization and debugging, I also have the car connected to my TV, where I can use the Jetson Nano as a regular computer.
Next Steps
In the next few articles, I plan on writing about the Software/Hardware Architecture of the system and how I implemented each of the ROS nodes mentioned earlier. Probably after a few months, I will also make the Github repo public and make it open to contributors.